

UPDATE: I have added an accumulator tank to my system. Read about it here.
For a full year prior to moving into the camper, I lived without running water. I lived on a third floor, and carried the water up 6 gallons at time. For much of that time, water was available on the second floor, so I only had one flight to climb. In a nutshell, I was used to not having water on tap. For that reason, I was not in a big hurry to jump on the water system. Despite being pretty handy, I avoid plumbing like the plague. It has never agreed with me. I stuck with my big blue jug/dispenser for a while, but it was clunky to operate and doing dishes was always a mess. As the camper became more “home like”, the desire for a more managed water system took hold. My water system has seen a couple of incarnations, which I will walk through here after a brief discussion of the existing system at the time of purchase.
My RV water system, like most others, has a couple of options available. There is a fresh water holding tank (mine is about 50 gallons) and a 12 Volt pump that feeds that water to the systems pipes. The pump works on a pressure switch. It will run until it feels enough pressure to turn off. When you open a faucet, the pressure drops causing the pump to switch on. When you turn the faucet off, pressure quickly rises, and the pump stops. It’s called a ‘demand’ water system. There is also a system that uses an air compressor to pressurize a sealed water tank to force water into the system. I have no experience there.
 The “City Water” connection is just a standard hose fitting. This is where you can connect to the water supply at an RV park, or to the hose spigot of that kind friend/host whose letting you mooch off their water. The wonderful bit is that the pressure is externally supplied by that system, so you don’t need your pump. A couple of points to note; 1. A regulator is recommended as RV systems are generally designed for lower pressures than those typically found from a “city water” supply, and 2. Use a “drinking water hose” for the connection, as common garden hoses get frequent complaints of adding an unpleasant taste to the water (we won’t even bother discussing the plethora of chemicals responsible for said taste).
After fixing a section of split pipe, I was able to run my water system from my fresh water tank. The pump had a faulty pressure switch, so I had to turn it on and off manually until I could replace it. I also ended up replacing the faucet due to a leak. It was leaking from an odd spot, and rather then mess with replacing bits an pieces that would cost close to or more than a whole faucet, I decided to skip all of that misery and do it all. I learned two lessons. First, and very simple, I learned that RV faucets are standard size faucets. Thats pretty obvious to anyone familiar with faucets. I am not one of those people. I get stuck assuming that everything is smaller, but it’s not always the case. The second lesson was that my pump doesn’t like aerators or sprayers. I got a faucet with a sprayer on the side thinking that it would alleviate some of troubles of having such a tiny sink (filling a pot, rinsing a dish, etc…). The pump has a hard time with it. It gives too much back pressure, so the pump kicks on/off repeatedly when I use it. It works for a few quick things here and there. I also had to remove the aerator from the main faucet for the same reason – it created too much back pressure. I was able to remove just the aerator and screw the rest of the assembly back into place so the water still has a smooth stream. Without it, the water is expelled in a messy fashion.
 My primary concern with water was freezing. My freshwater tank is exposed to the brutal elements of Northern Maine. Freezing temperatures are possible about six months out of the year, and for three of those they are almost constant. I don’t have a water spigot nearby, and even if I did, it would have to be protected by electric heat tape. I’m trying keeping my power consumption low, so the amperage to run heat tape would not be an option.
My solution was to set up an internal water tank. The easiest way to do so would be to put a tank close to the existing pump so I could just move one water line and keep my whole system intact (except for detaching one external line). I put the tank near the front of the camper next to the pump. It blocked the entrance to the cab of the vehicle, but I was planning on walling that off for insulation, so it made sense. I had a small 11.5 gallon tank that was salvaged from another old camper that fit perfectly. I built a small stand to set it on because I was afraid of accidentally putting my foot through it. It also gave me the ability to drain it if needed, and I planned on topping it with a cutting board to make it a food prep surface. This was all well and good, but after a few cold days I had second thoughts. Temperature readings along the walls where the water lines run were quite low. I was keeping the thermostat at 40F degrees whenever I was sleeping or when I left. 40 seemed like a safe temp to keep water lines from freezing (and my wallet from draining on propane) but my readings suggested otherwise.
Since my bathroom faucet/shower was not going to be in use (since I have no hot water heater), I decided that there was no need in keeping my WHOLE system intact. I only needed water in the kitchen. When I replaced the stove, I was a little bummed that the new one was a tad shorter, which left a gap underneath. You couldn’t really see it, and it turns out to be perfect. That extra space allowed me to fit my water tank underneath it, and the gap helps let warm air into the cabinet. Funny how things work out. There was enough room to mount the pump there, and some simple rewiring to power it. It’s actually easier to refill there as well. I carry in 3 gallons at at time, procured at my parents house with a bucket that has a spout attached. I run a line from the bucket into the tank and open the spout to transfer the water to the tank. I’ll post a video of that process soon.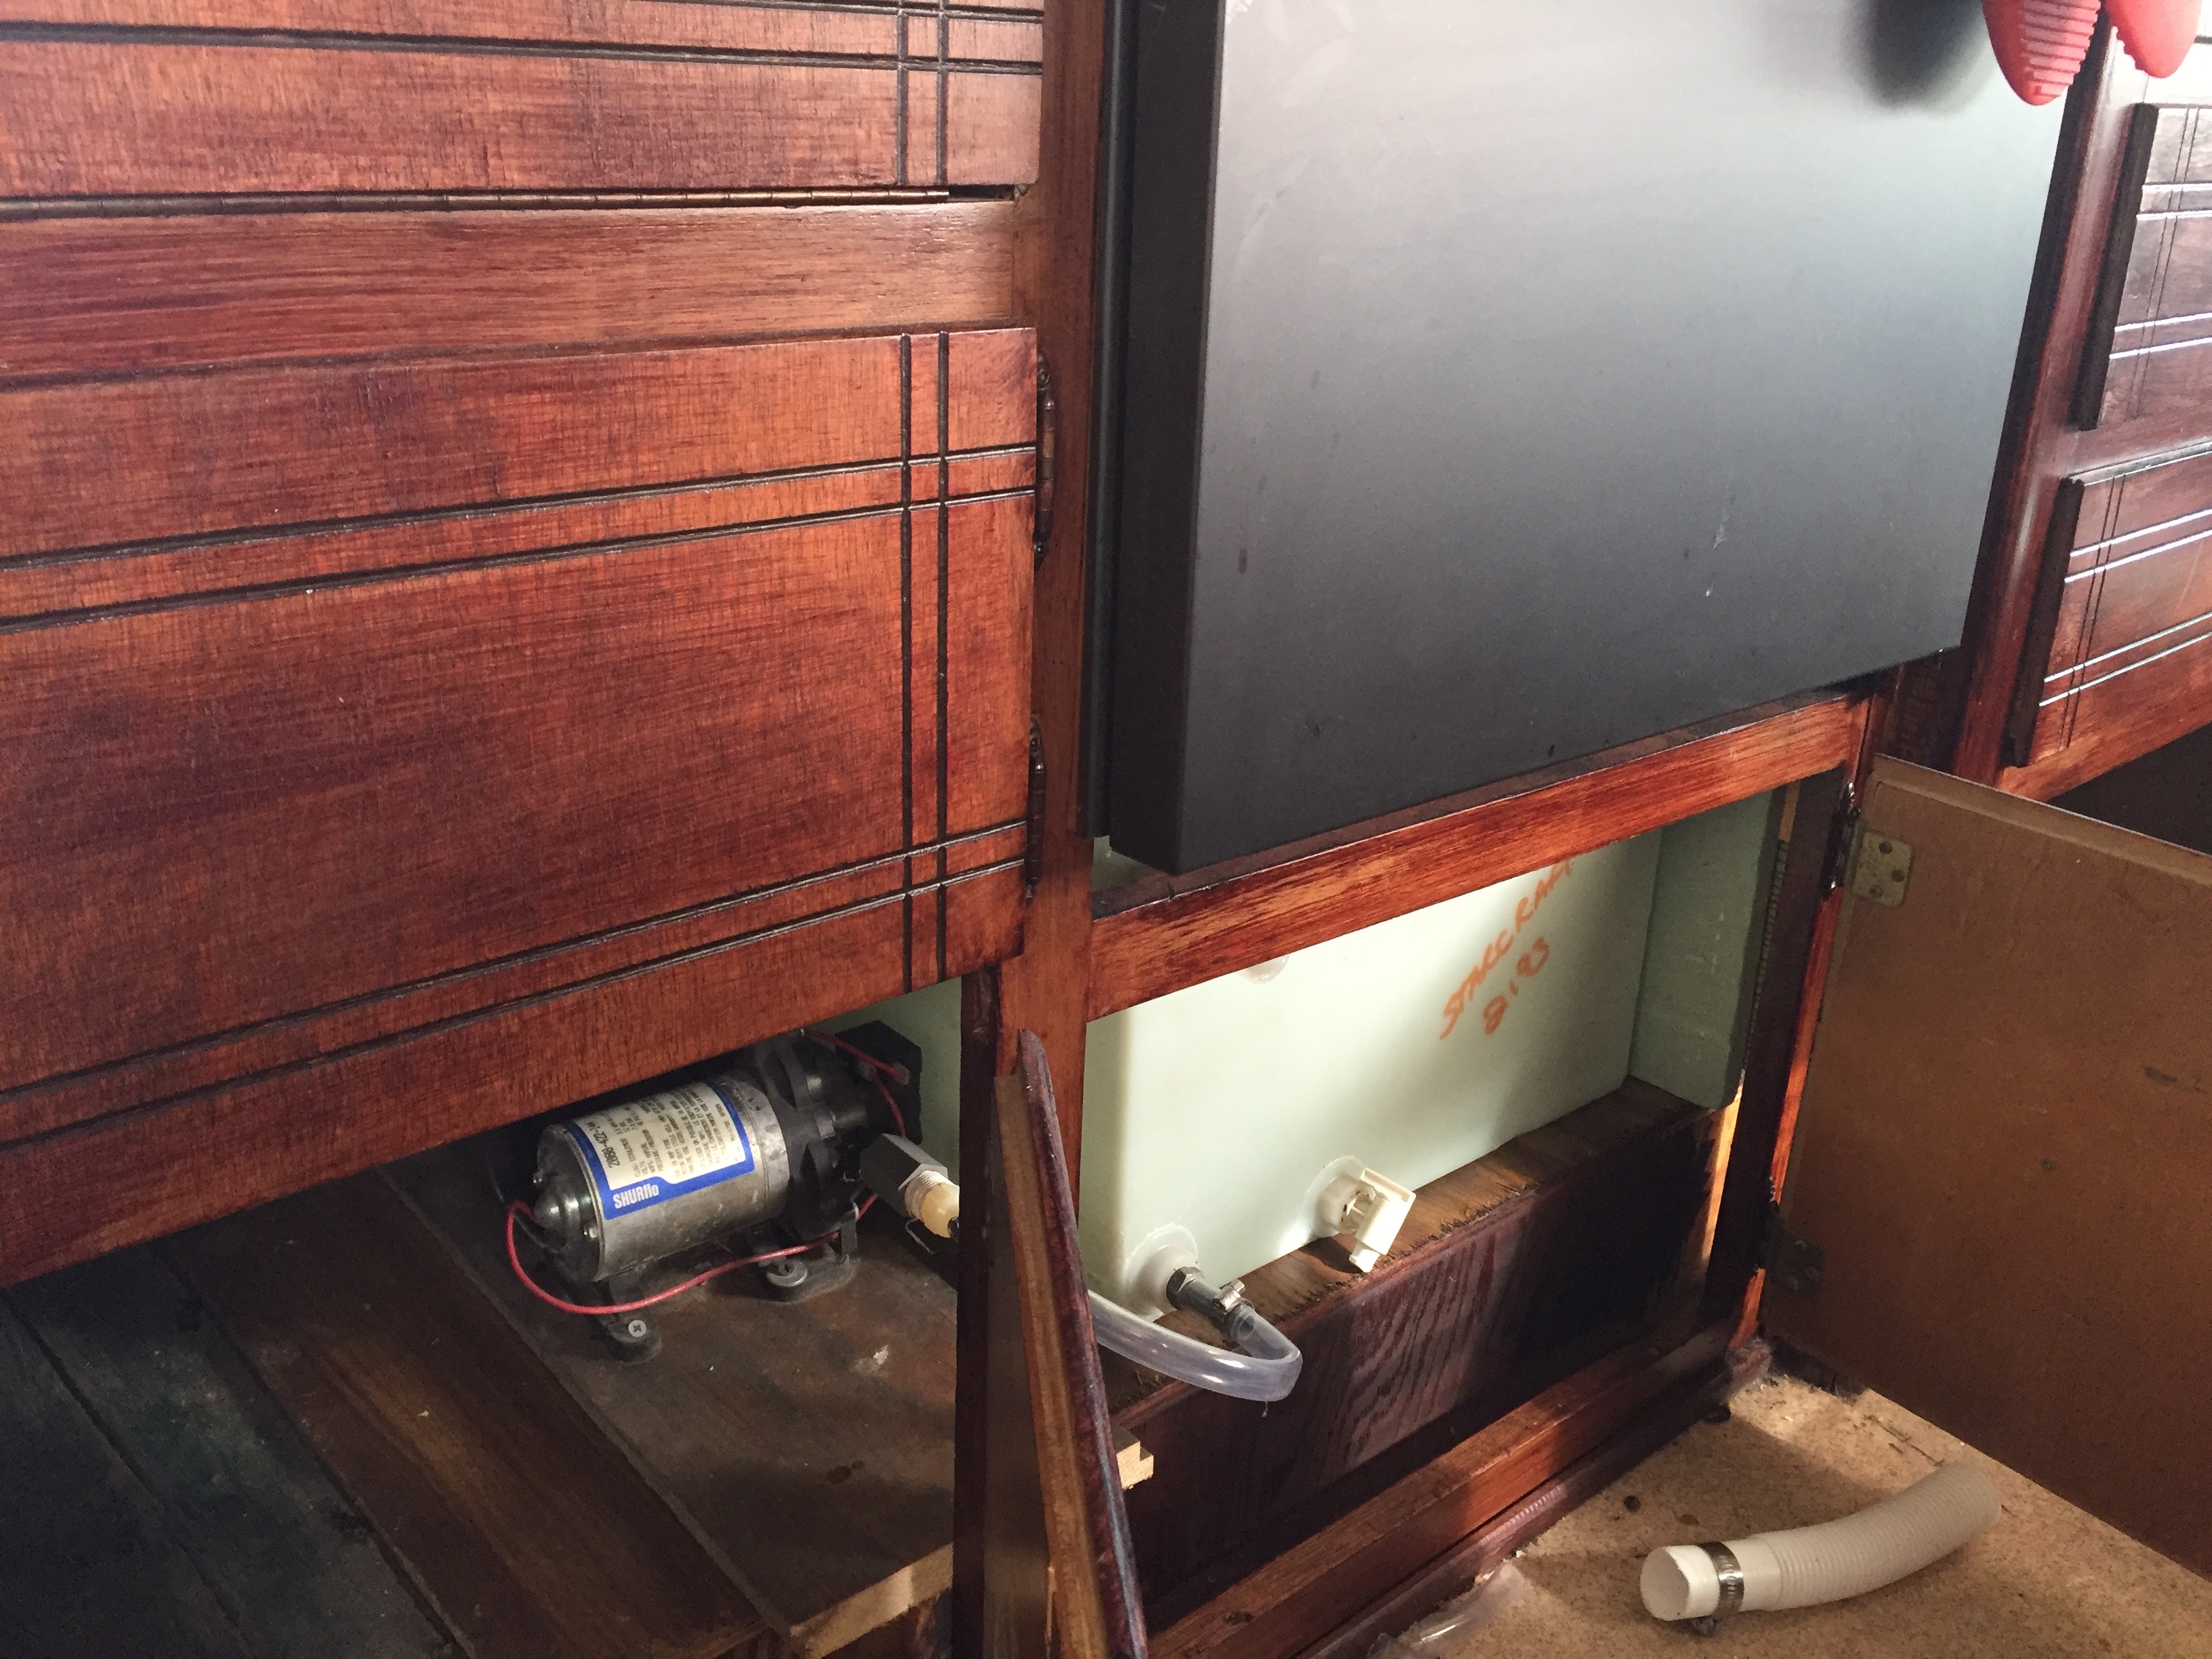
I should also mention the drain situation. The greywater and blackwater tanks (that hold the waste water from the sink and toilet respectively) have been removed. I have heard of people leaving them on and using anti-freeze, or leaving the greywater valve open to drain onto the ground. My blackwater tank was cracked (presumably from the previous owners letting it freeze), and the greywater tank got cracked during removal (which was actual good as I found out it had been contaminated by the blackwater). I drain my sink into a 5 gallon bucket underneath. Every so often I dump it outside. By sticking with biodegradable soaps, I can safely dump this around trees and such. Greywater reuse is a common element of many good composting programs. Since I’m a geek, I’m thinking of making a float circuit that will warn me when the bucket needs to be dumped, rather than wait for the inevitable day when I find out the hard way. I learn almost everything the hard way.
I always keep water in the kettle, so come on over. Tea time is all the time.
That was so interesting. Shawn Thomas Morin you are a genius. BTY what is you IQ? Can’t wait for your next posts. Can’t wait to see your little abode next year. Love you.
I love the way you explain things so us regular people can actually understand. I know how hard you’ve worked on your ‘little’ home and look forward to your next adventure!
The question of Mr. Morin’s IQ is complicated in that at room temperature it’s off the chart, but at (Caribou+December) degrees Fahrenheit it approaches only 35-50% above average. If he could get his camper to Florida full time, simple linear regression dictates that he’d have a Nobel prize in less than a week.