
UPDATES:
See Version 3.2 HERE
See Version 2.0 HERE
Now that the northern Maine temperatures have finally crept above 40°F on a regular basis, I decided it’s time to talk about how I managed to stay warm this past winter. I’d like to start things off with my thermostat. There is a lot to say here, so i will devote the whole post to it. Other cold beating techniques will be discussed in part II.
Why Build a Thermostat?
“You know, you can buy a digital thermostat at Lowes for $17?” I got some version of that response from almost everyone I spoke to about my idea of building my own. The thermostat that came with my camper was working just fine. I didn’t need to build one, I wanted to build one. I take great pleasure in making things that solve a problem, and my DIY thermostat had the potential to solve a number of problems.
The first problem it solved was saving me $17. Everyone was right, I could just by a thermostat. At the time, Lowes had a basic digital Honeywell thermostat for $17. At the same time, I was broke, and $17 buys an epic amount of ramen. My geek stash had all of the bits and pieces I would need already, so there was no expense incurred in this project. The cost of propane was a big concern for me. I decided I needed to maintain a minimum of 40°F. Warm enough to ensure my water didn’t freeze, but cold enough to conserve on propane. My analog thermostat only went as low as 50°F, and “OFF” was so close to 50°F that I could never be sure if it was on 50°F of off completely.
Some higher tech solutions were deployed for extra geek cred. I knew I would forget to turn the temperature down before I left for work sometimes, so I used an infrared motion sensor to tell whether I was home or not. I wanted to gather data regarding how long, and how often my furnace ran. It would give me a gauge on how many hours of run time I could get out of a tank of propane. I used a data logger to write data to an SD card for later science.
How it Works
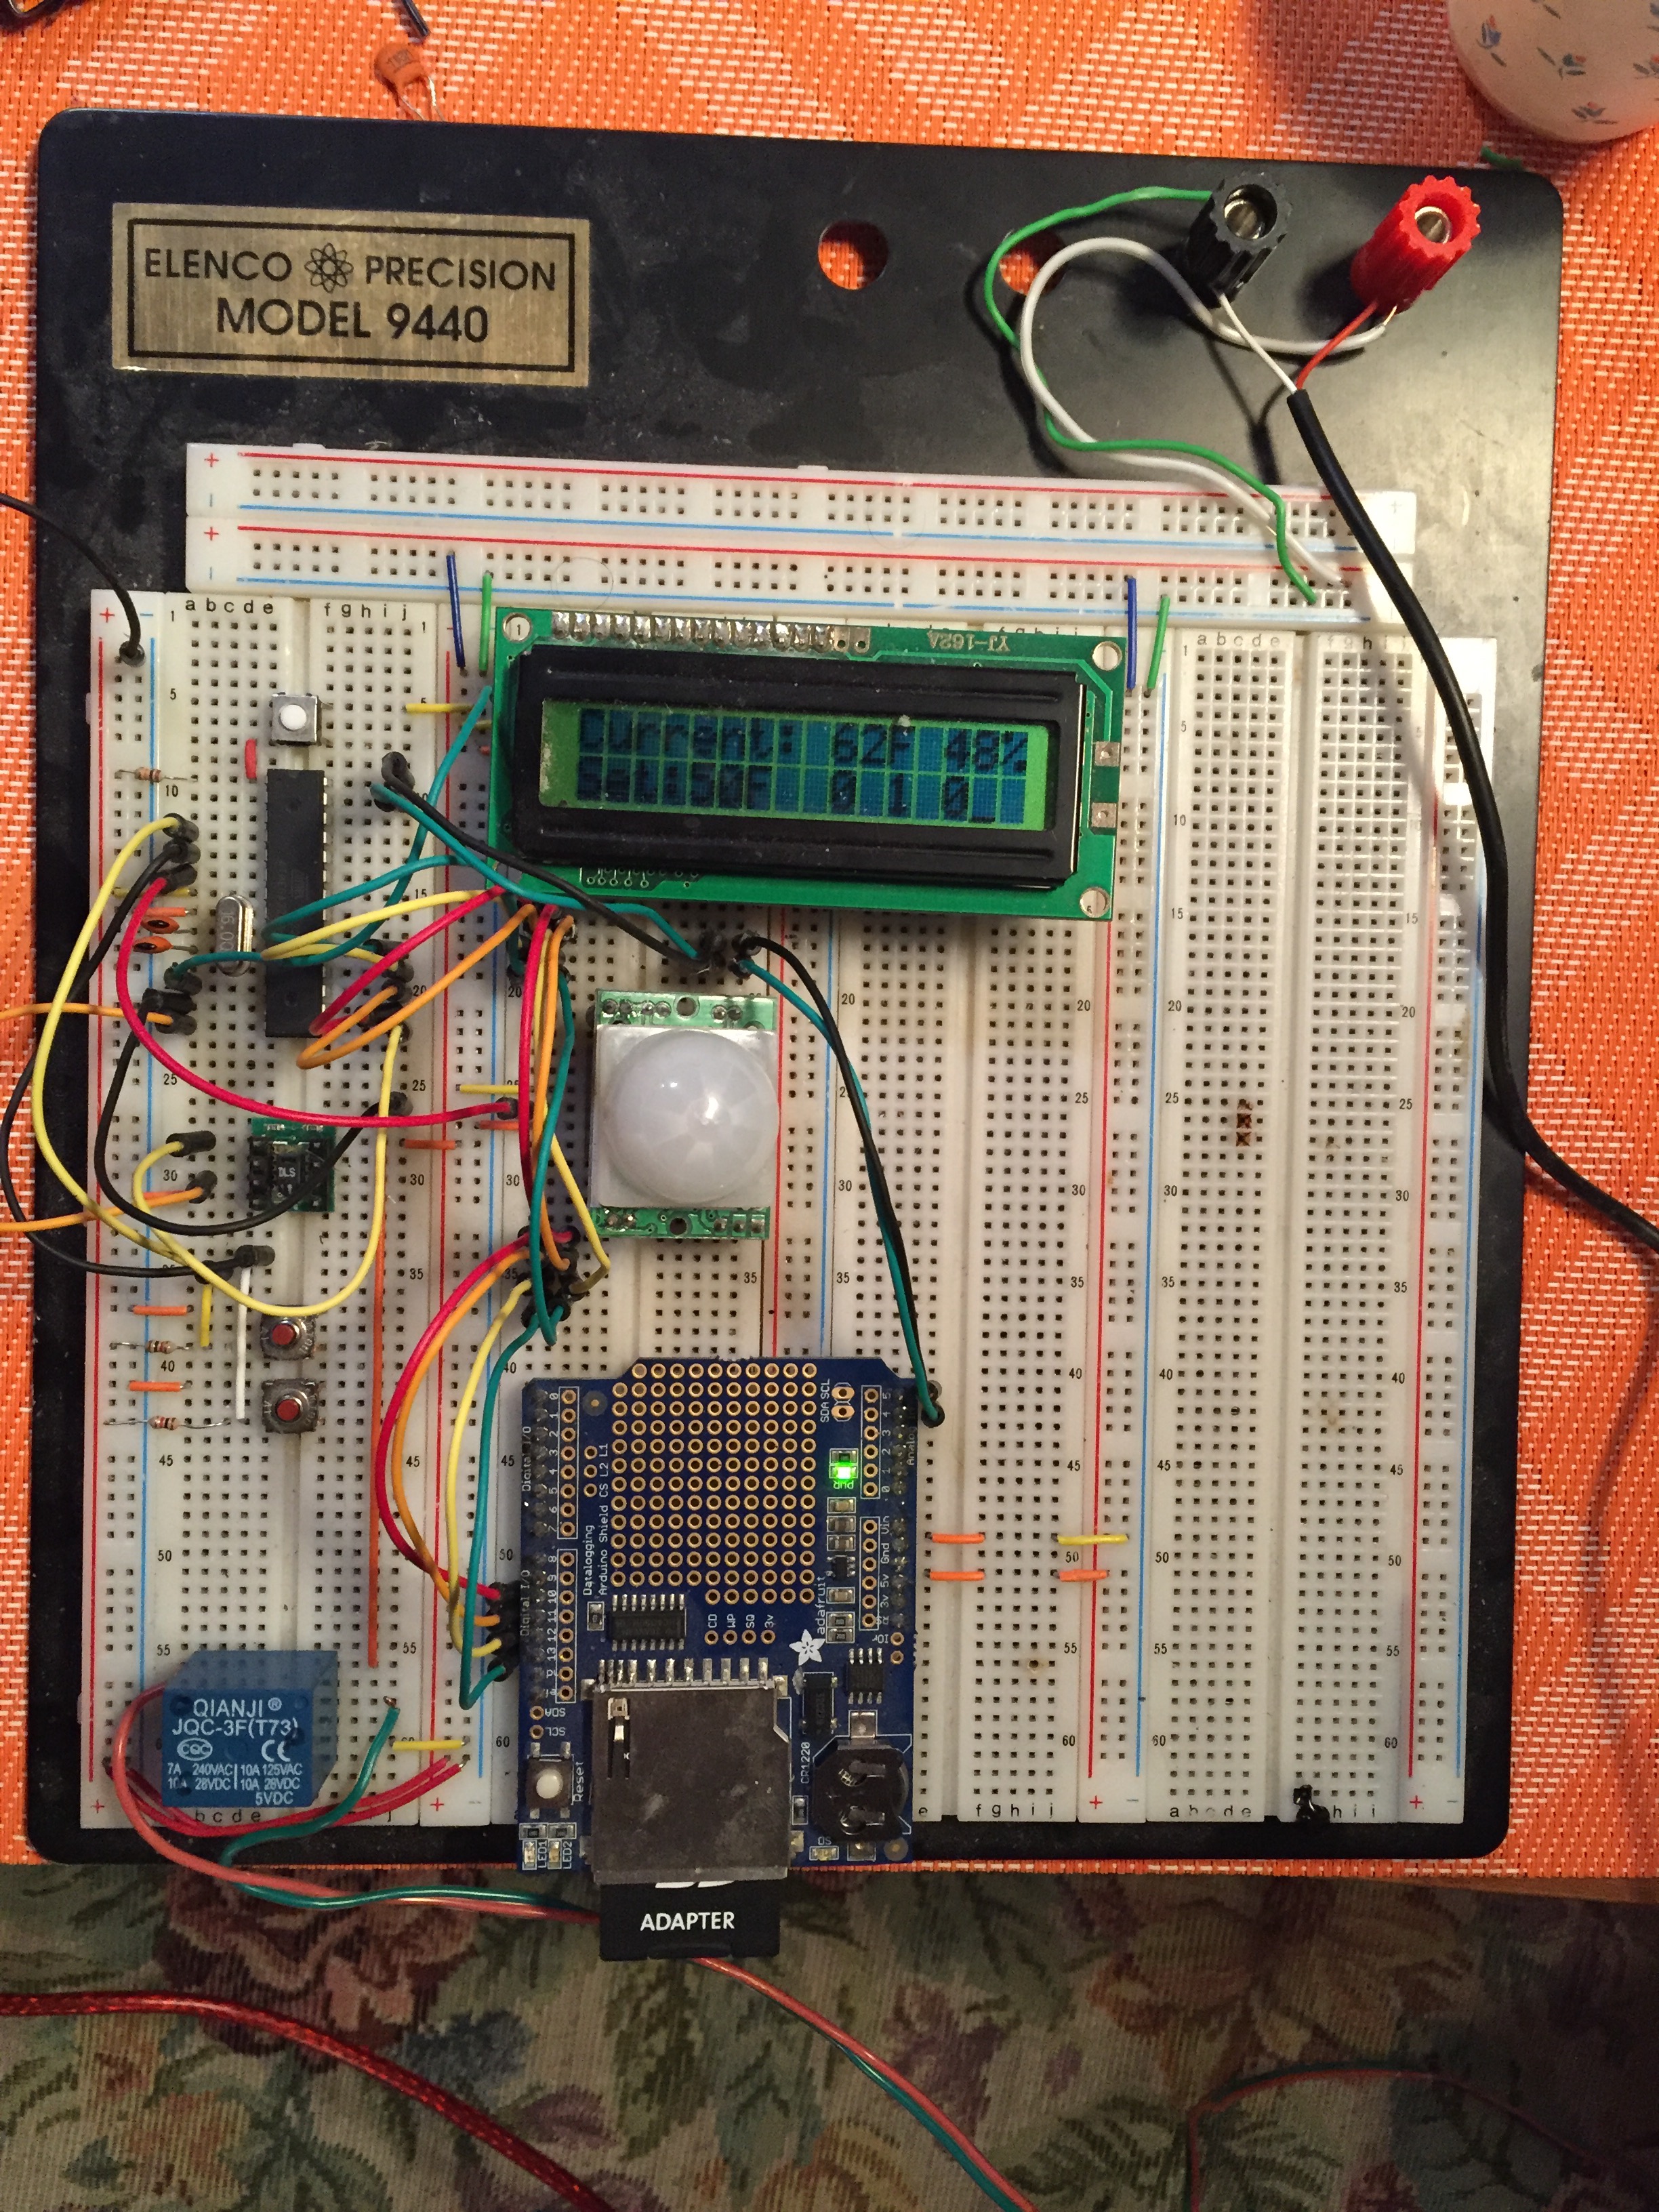
I’m going to try my best to keep it as layman as possible for the electronically uninitiated, but I will include some gritty details later to appease the electron junkies in the pack. This whole system is run by a microcontroller. Think of it like the processor (CPU) in your computer or whatever device you’re using to read this right now. All of the code that makes up the software you use is just a series of instructions that is read and executed by the CPU. So, I write some code, load it onto the controller chip, and it runs the program over and over. In this circuit, there is a temperature and humidity sensor. The controller constantly asks the sensor what the temperature is. I set my desired temperature by using two buttons to bring it up or down. When the temperature reported by the sensor is lower than the temperature I set, the code turns the furnace on. It’s more complicated than that, but that’s the basic idea. The controller also uses the infrared sensor to check for motion. If it sees no motion for an hour, it goes into a 40°F standby mode. Any time the furnace turns on, that event is logged to the SD card, including the time. When the furnace turns off, that event and time is logged as well. The times are subtracted from one another to determine how many minutes the furnace ran. That time is added to a cumulative run time.
The Geek Stuff
Here is some jargon. Feel free to skip this paragraph. This was programmed using the Arduino environment, but in a standalone arrangement (the controller runs on its own, without the support of the programmer). I’m using an older Sensiron temp/humidity sensor, and Adafruit’s Datalogging Shield. All of the pertinent info is written out to a Parallax 2×16 LCD. The furnace turns on with a contact closure, which is achieved by energizing a 5V relay. There is a mix of both i2C and SPI serial communications. The Sensiron chip uses i2C, the data logger uses BOTH protocols (i2C for the onboard RTC chip, and SPI for the SD read/write operation). I’m happy to share my code with anyone interested, but I’m not sure how compatible it is with more modern temp sensors.
 The Numbers
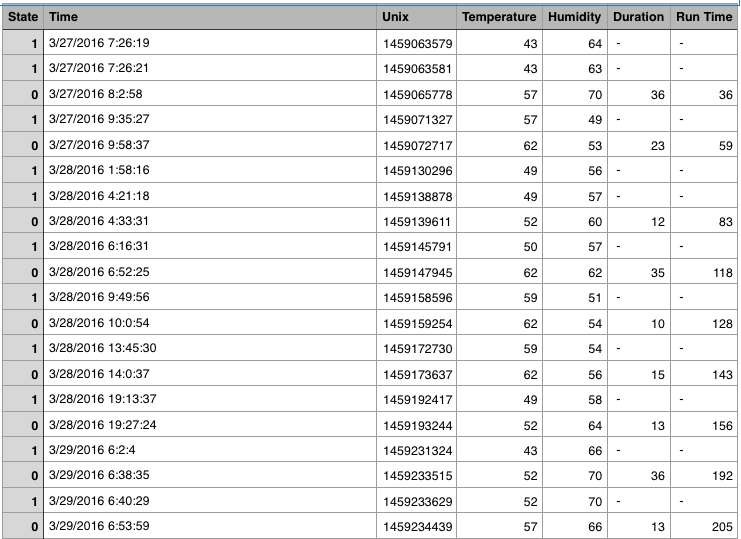
I lucked out, because we had a very mild winter. The lowest temperature I saw was -16°F (our wind chills brought us down to -30°F once in a while, but not often). I only spent $300 on propane all winter, and I was expecting much more. Each 20lb propane tank gave me over 30 hours of burn time depending on how much I was cooking (the stove uses the same propane). The spreadsheet on the left is a screen grab of the CSV file as it is written to the SD card. By keeping the temp at 40°F while sleeping or when I was gone, I saved a buttload of money. It took an exceptional amount of additional propane just to try to maintain 50°F overnight. Sleeping at 40°F was quite pleasant. A good sleeping bag is the only prerequisite. Getting ready for work in the morning is NOT quite so pleasant at 40°F, but I wasn’t expecting this to be easy.
Conclusion
What I really love about this process is the troubleshooting aspect of problem solving, and what I learn as I navigate it. Reality never behaves the way our ideas do on paper, and the act of wrapping our brains around those surprises teaches us a lot about the world. Sometimes, something seemingly so simple is actually far more complex. Sometimes, very complex things have very simple answers. I assumed that my code could say “when the temperature hits 60°F, turn the furnace off.” But in reality, the temperature fluctuates a lot as the room seeks equilibrium. The furnace would turn on and off several times while this happened, and it was hard on the electrical system. I had to write code that held the furnace on through a “buffer” period to let the room stabilize, and that minor change took more thought to engineer than the whole system did.
When we finally hit a warm spell, my furnace died! The timing couldn’t have been any better. It would have been an outright calamity even a week before. I had just made $80 helping my Mom out, and the part I need to fix the furnace happens to cost $80. Oh, how kind the universe can be when I don’t get in the way. In part two, we’ll talk about clothing, and the dynamic nature of human comfort.
UPDATE: I’ve added some features! See Version 2.0 HERE
Shawn, you are way over my head on stuff but I do get the basics, love reading your adventures at be self sufficient.