Enter, The Food Computer


openaglogowhite_small2The coolest part of my trip to the White House was the discovery of the Food Computer. This device is the small scale prototype for a much larger project taking place a the MIT Media Lab. It’s the work of Caleb Harper who is behind MIT’s Open Agriculture Initiative. The project has several aims. Ranging from educating kids about food (where it comes from, how it grows, etc…), researching how to grow better food, and of course, feeding people.


pfc_2
Caleb’s PFC hardware guts

Enter, the Food Computer

The PFC (Personal Food Computer) is the open source hardware and software system being developed to help change our food future. In layman’s terms, it is a system that controls all aspects of the plants environment over its whole lifespan. Since different plants have different requirements, the system uses a “climate recipe” (which is simply a series of instruction for the computer) designed the plant in question. Basically, you plant a seed (or a started seedling), select the climate recipe, and press play. The machine will maintain the right temperature and humidity, it will provide the proper nutrients, it will cycle the lighting, it will do everything the plant needs. Then you eat it.

pfc-parts
My Raspberry Pi and Arduino getting set up for growing.

How does it work?

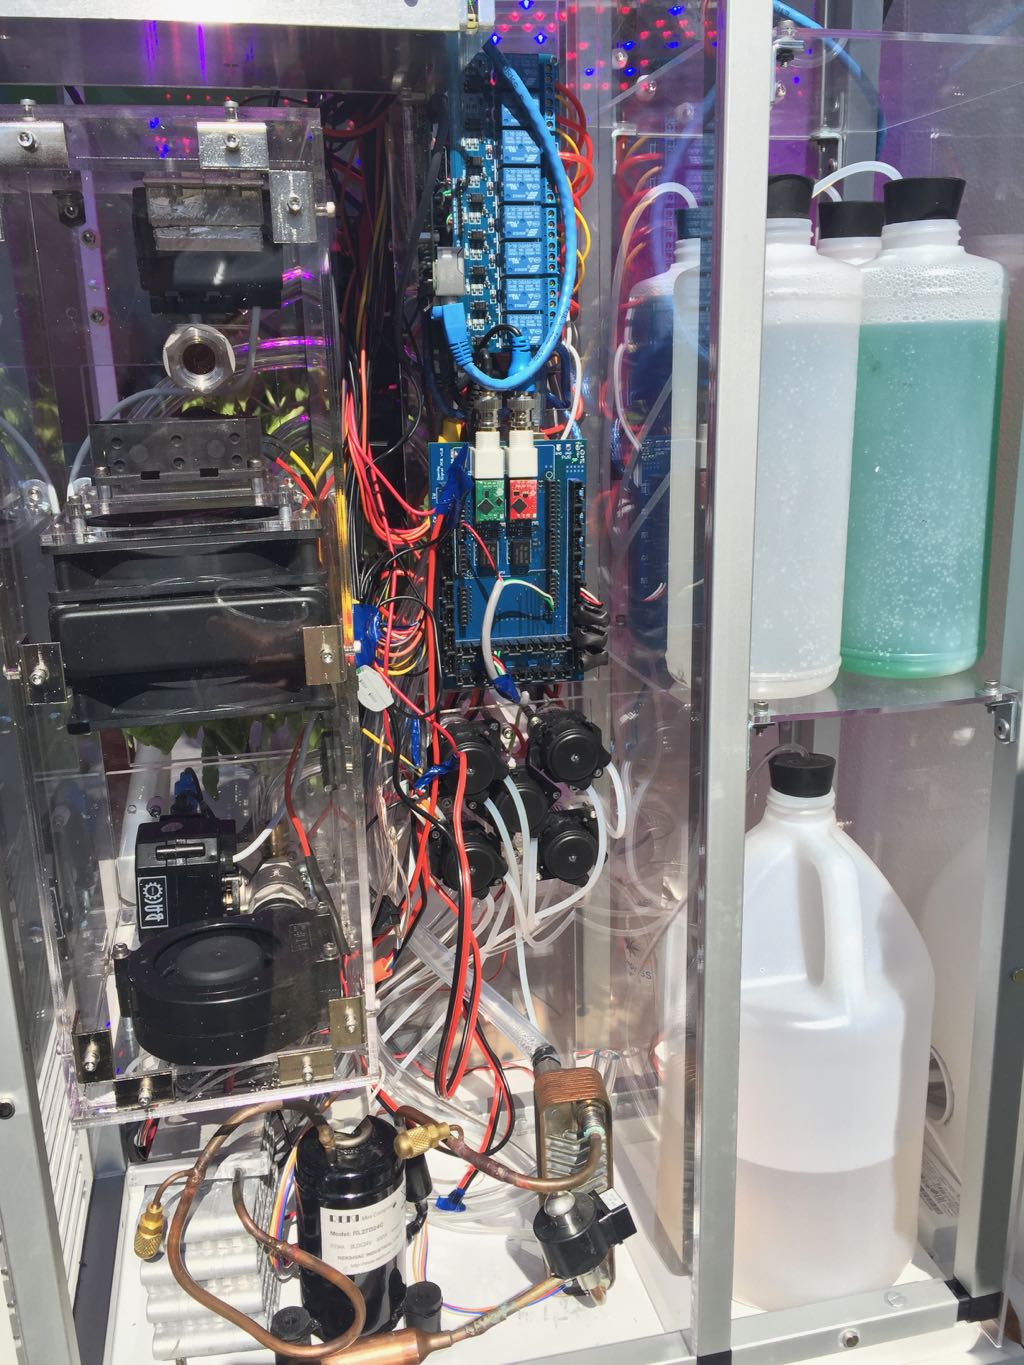
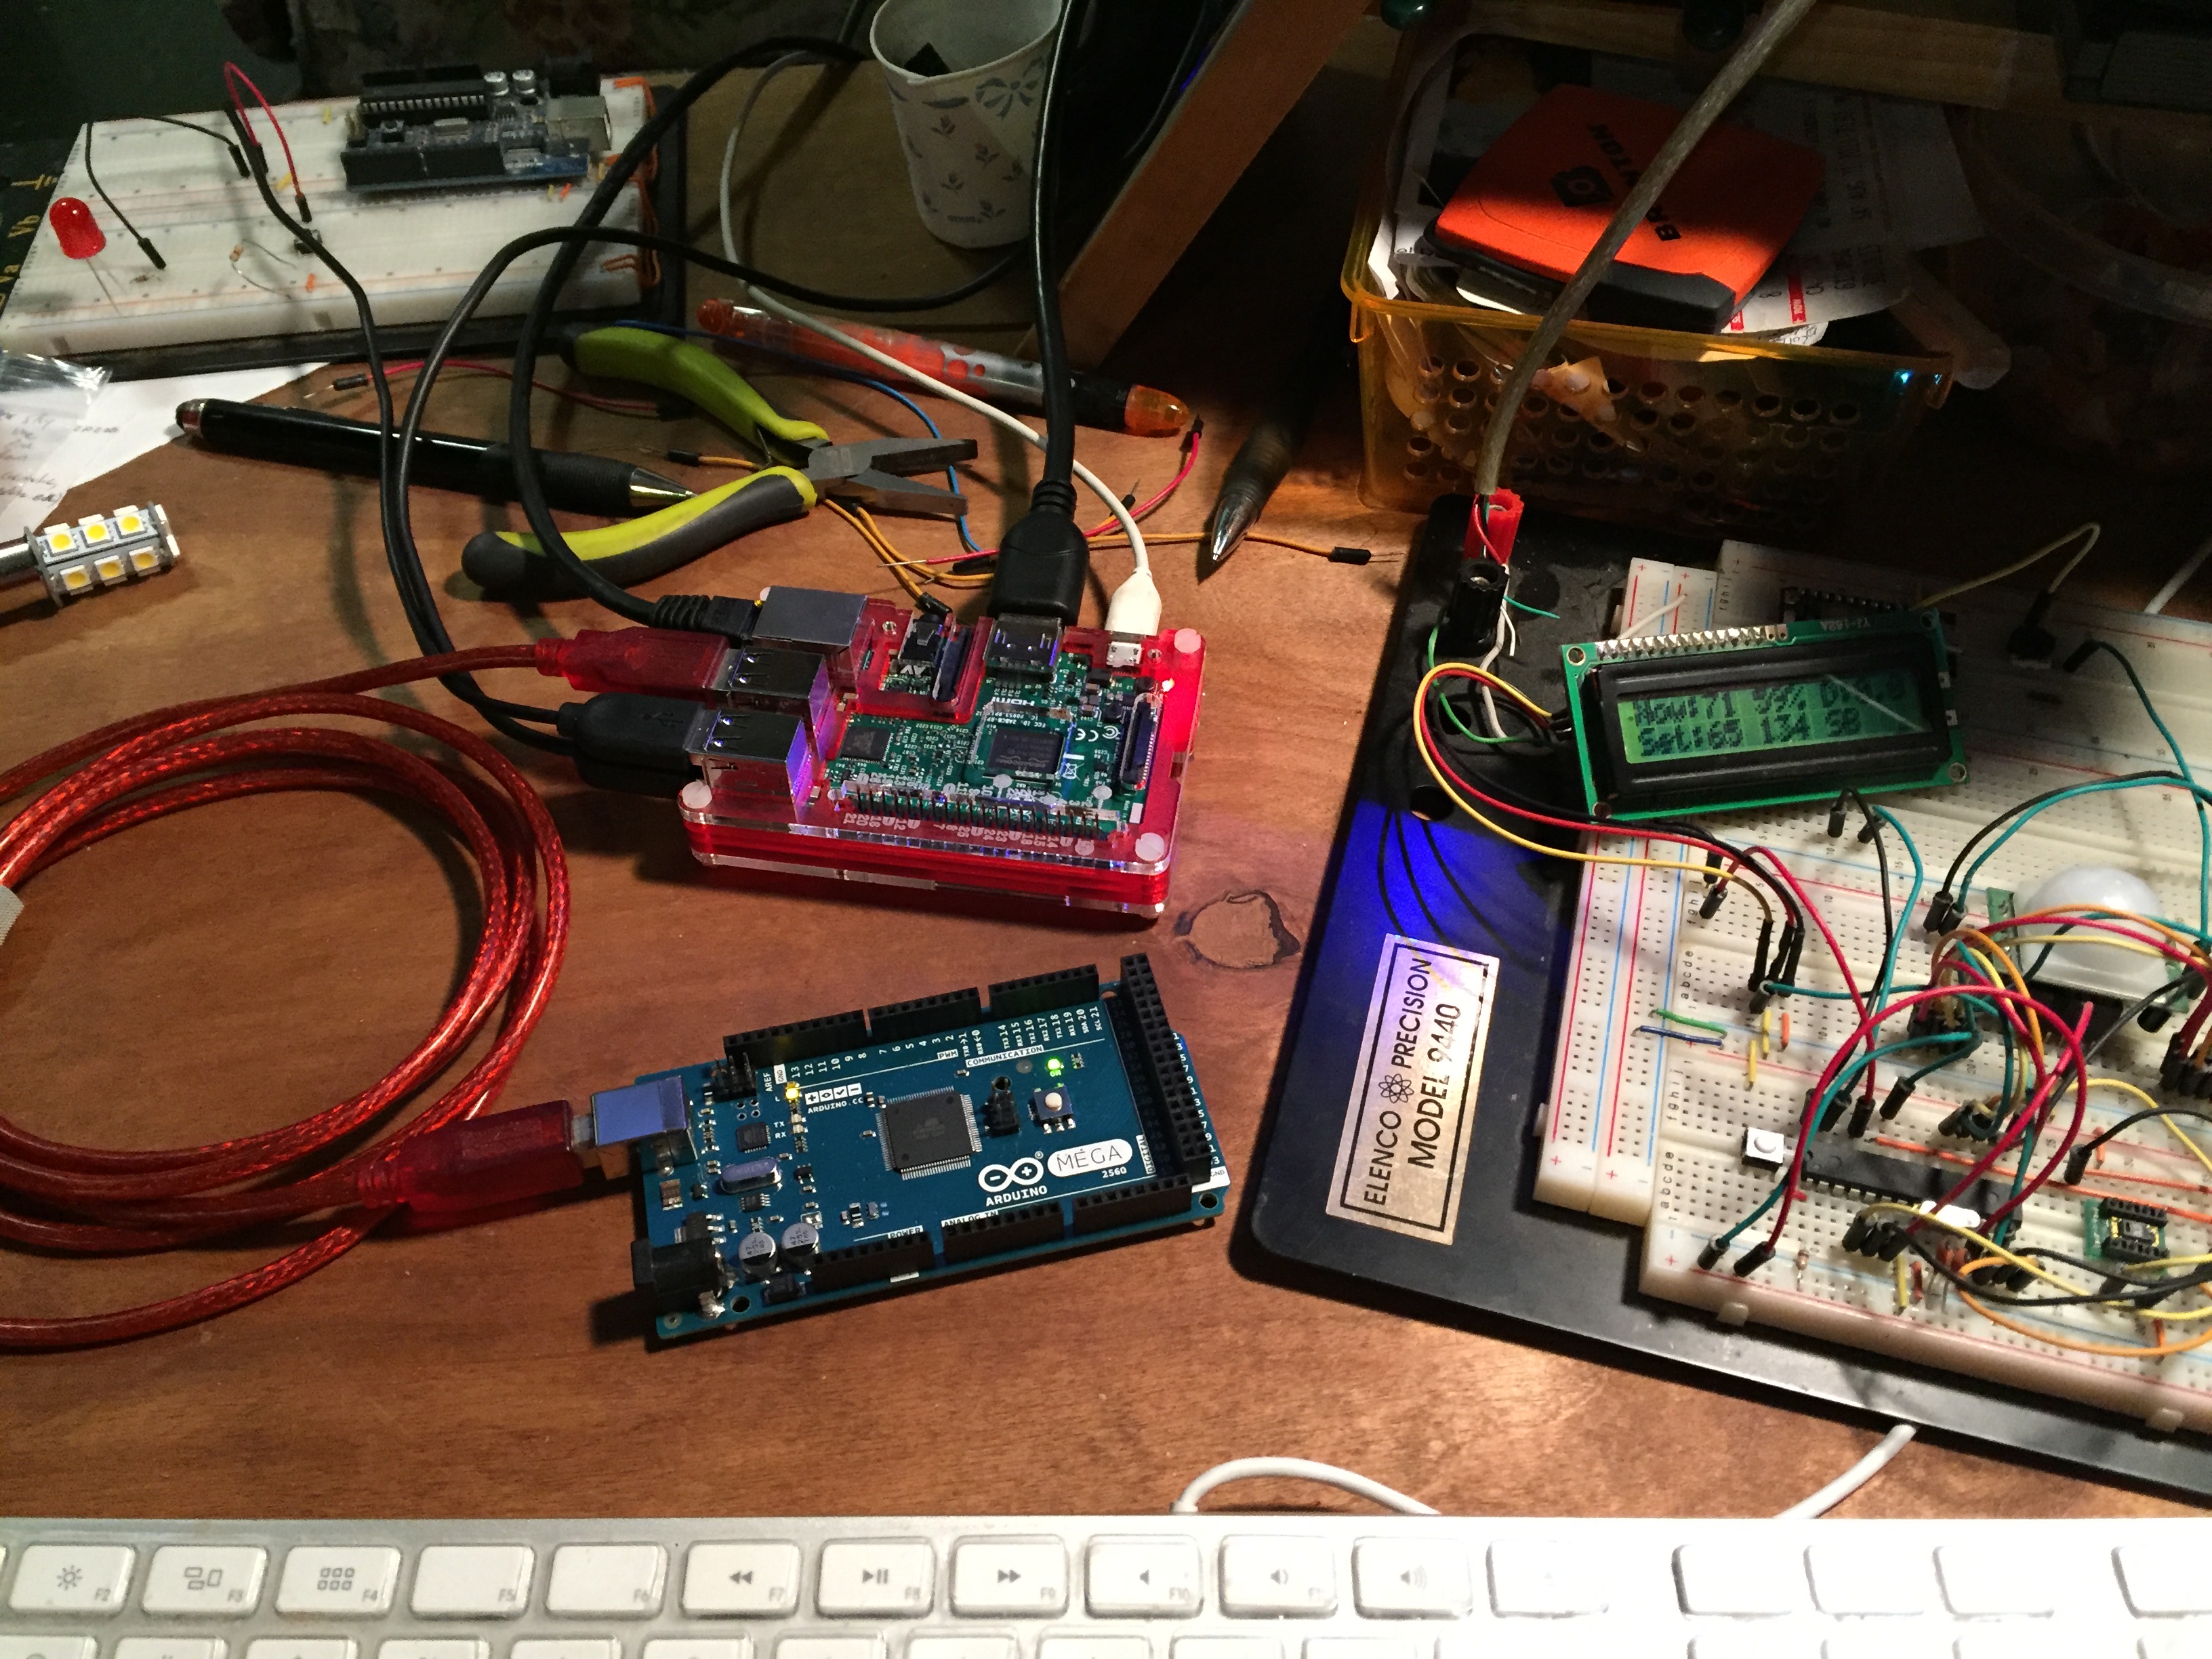
So, as you might expect, it’s a bit more complicated. There is quite a lot going on under the hood. Here’s bit of geek-speak; It uses a Raspberry Pi as it’s brain, and an Ardunio Mega for the heavy lifting. The Arduino controls the mechanical bits like pumps, and relays, and monitors the array of sensors. The sensor data is passed to the Pi where the climate recipe can tell the Arduino when to perform necessary functions. For example, a pH sensor tells the system when to raise or lower the pH, and a peristaltic pump can supply a solution to make that change. It also does this with the nutrient solutions electro-conductivity, among other things. You can control CO2, Dissolved Oxygen, and nutrient solution temperature. So, the pant receives everything it needs, precisely when it needs it, (ideally) without human intervention.

pfc_1
Caleb’s PFC at SXSL growing basil

As we speak (December 2016), the PFC V.2.0 is being released. The original version was more difficult and expensive to build. V2.0 is working to change that. It’s an alpha release right now, so there is still work to be done to make it as cheap/easy/accessible as possible. Being open source, anybody can download the plans and the software to build one. You can contribute your ideas to make it better. The release of the plans is an ongoing process, so don’t expect a simple plug and play approach just yet.

So where is this headed?

As the PFC becomes more accessible, more people will build them (including schools, some are already doing so). The plan is to make kits available for purchase to simplify the part sourcing. As the user base increases, a database of climate recipes will amass. You can download a recipe that suits your needs, or you can experiment and upload your own results for others to use.

Whats really exciting is the opportunity for knowledge. Caleb described to me how his team freeze dries the resulting plants and places them in a spectrometer to see the nutrient/chemical break down. They can change growing variables and see the direct results of those variables on the plants chemistry. They can stress the plant in very specific ways (light or nutrient starvation, bacteria introduction, pH/EC shifts) to see what chemical defenses it puts up, and how that changes the nutrient/chemical properties. These things affect the flavor, the nutrition, the shelf life, etc… The best part is, IT’S ALL REPEATABLE. A good result can be downloaded and recreated by anyone, anywhere, with a PFC.

Food Servers and Beyond

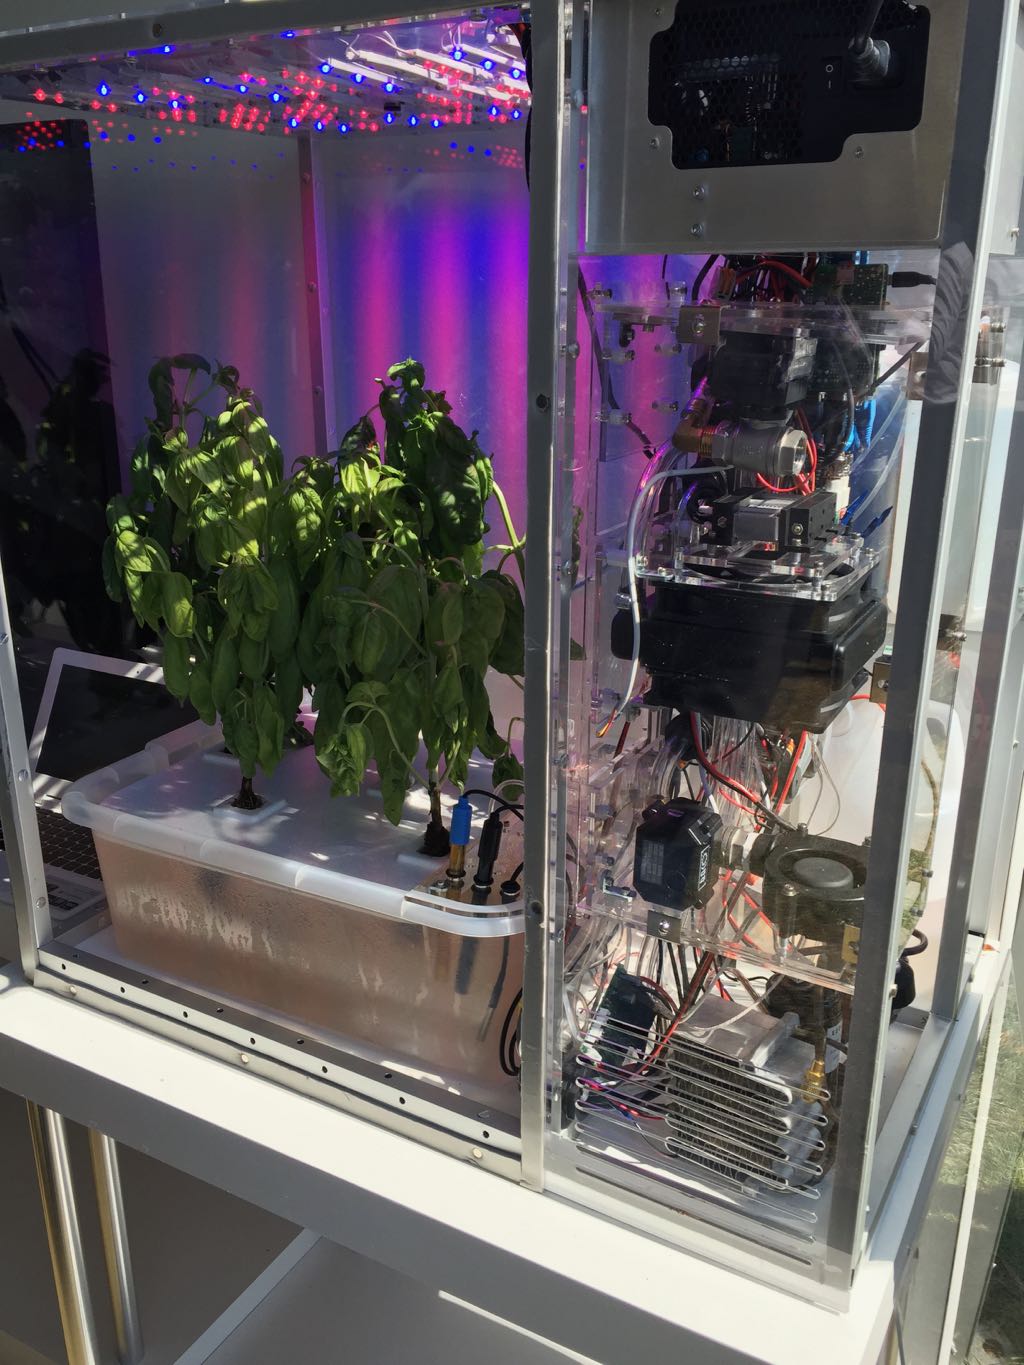
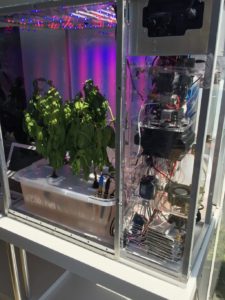
The PFC is admittedly small. You aren’t going to feed your family with it. It’s footprint is about 3 feet wide by a foot and a half deep, and it stands maybe 3 feet tall. It could fit on a counter or a small table, and can grow about 4 small plants at a time. But the PFC is simply the home version of what MIT is really building at OpenAg. The PFC is like a test platform to get us geeks involved and improve the system. The lessons learned in the small scale are being put to use in Food Servers. The servers are built in shipping containers, using the same hardware and software. This is all happening now, in the new lab that OpenAg has just opened. The next phase is the Food Datacenter, which scales the project to warehouse size. The scalability is built into the project, so it’s instantly scalable without having to be reimagined.

Servers and Datacenters can be deployed in various ways. They have a home in climates that don’t support standard agriculture, they have a home where food is scarce and people are hungry. In America, they have a home in the city. According to the census bureau (in early 2015), 62.7% of our population lived in the city, and cities make up 3.5% of our land. The food to feed our population often travels an enormous distance. The urban agriculture push seeks to change that. We see more city gardens and roof gardens, but it’s not enough. There is talk of entire floors of skyscrapers becoming farms. This is where food computers can play a role.

So what is my plan?

I am WAY into the whole food computer concept, and I hope to contribute to the initiative ASAP, but I am financially challenged. They are working hard to make a system that is affordable to build, but obviously this system will presumably lack some of the higher tech solutions that MIT is deploying in their own systems. I’m keeping my eye on their progress, and buying what I can, when I can, in order to deploy a PFC. But I’m not spending my time idly, I’m building my own hydroponic system.

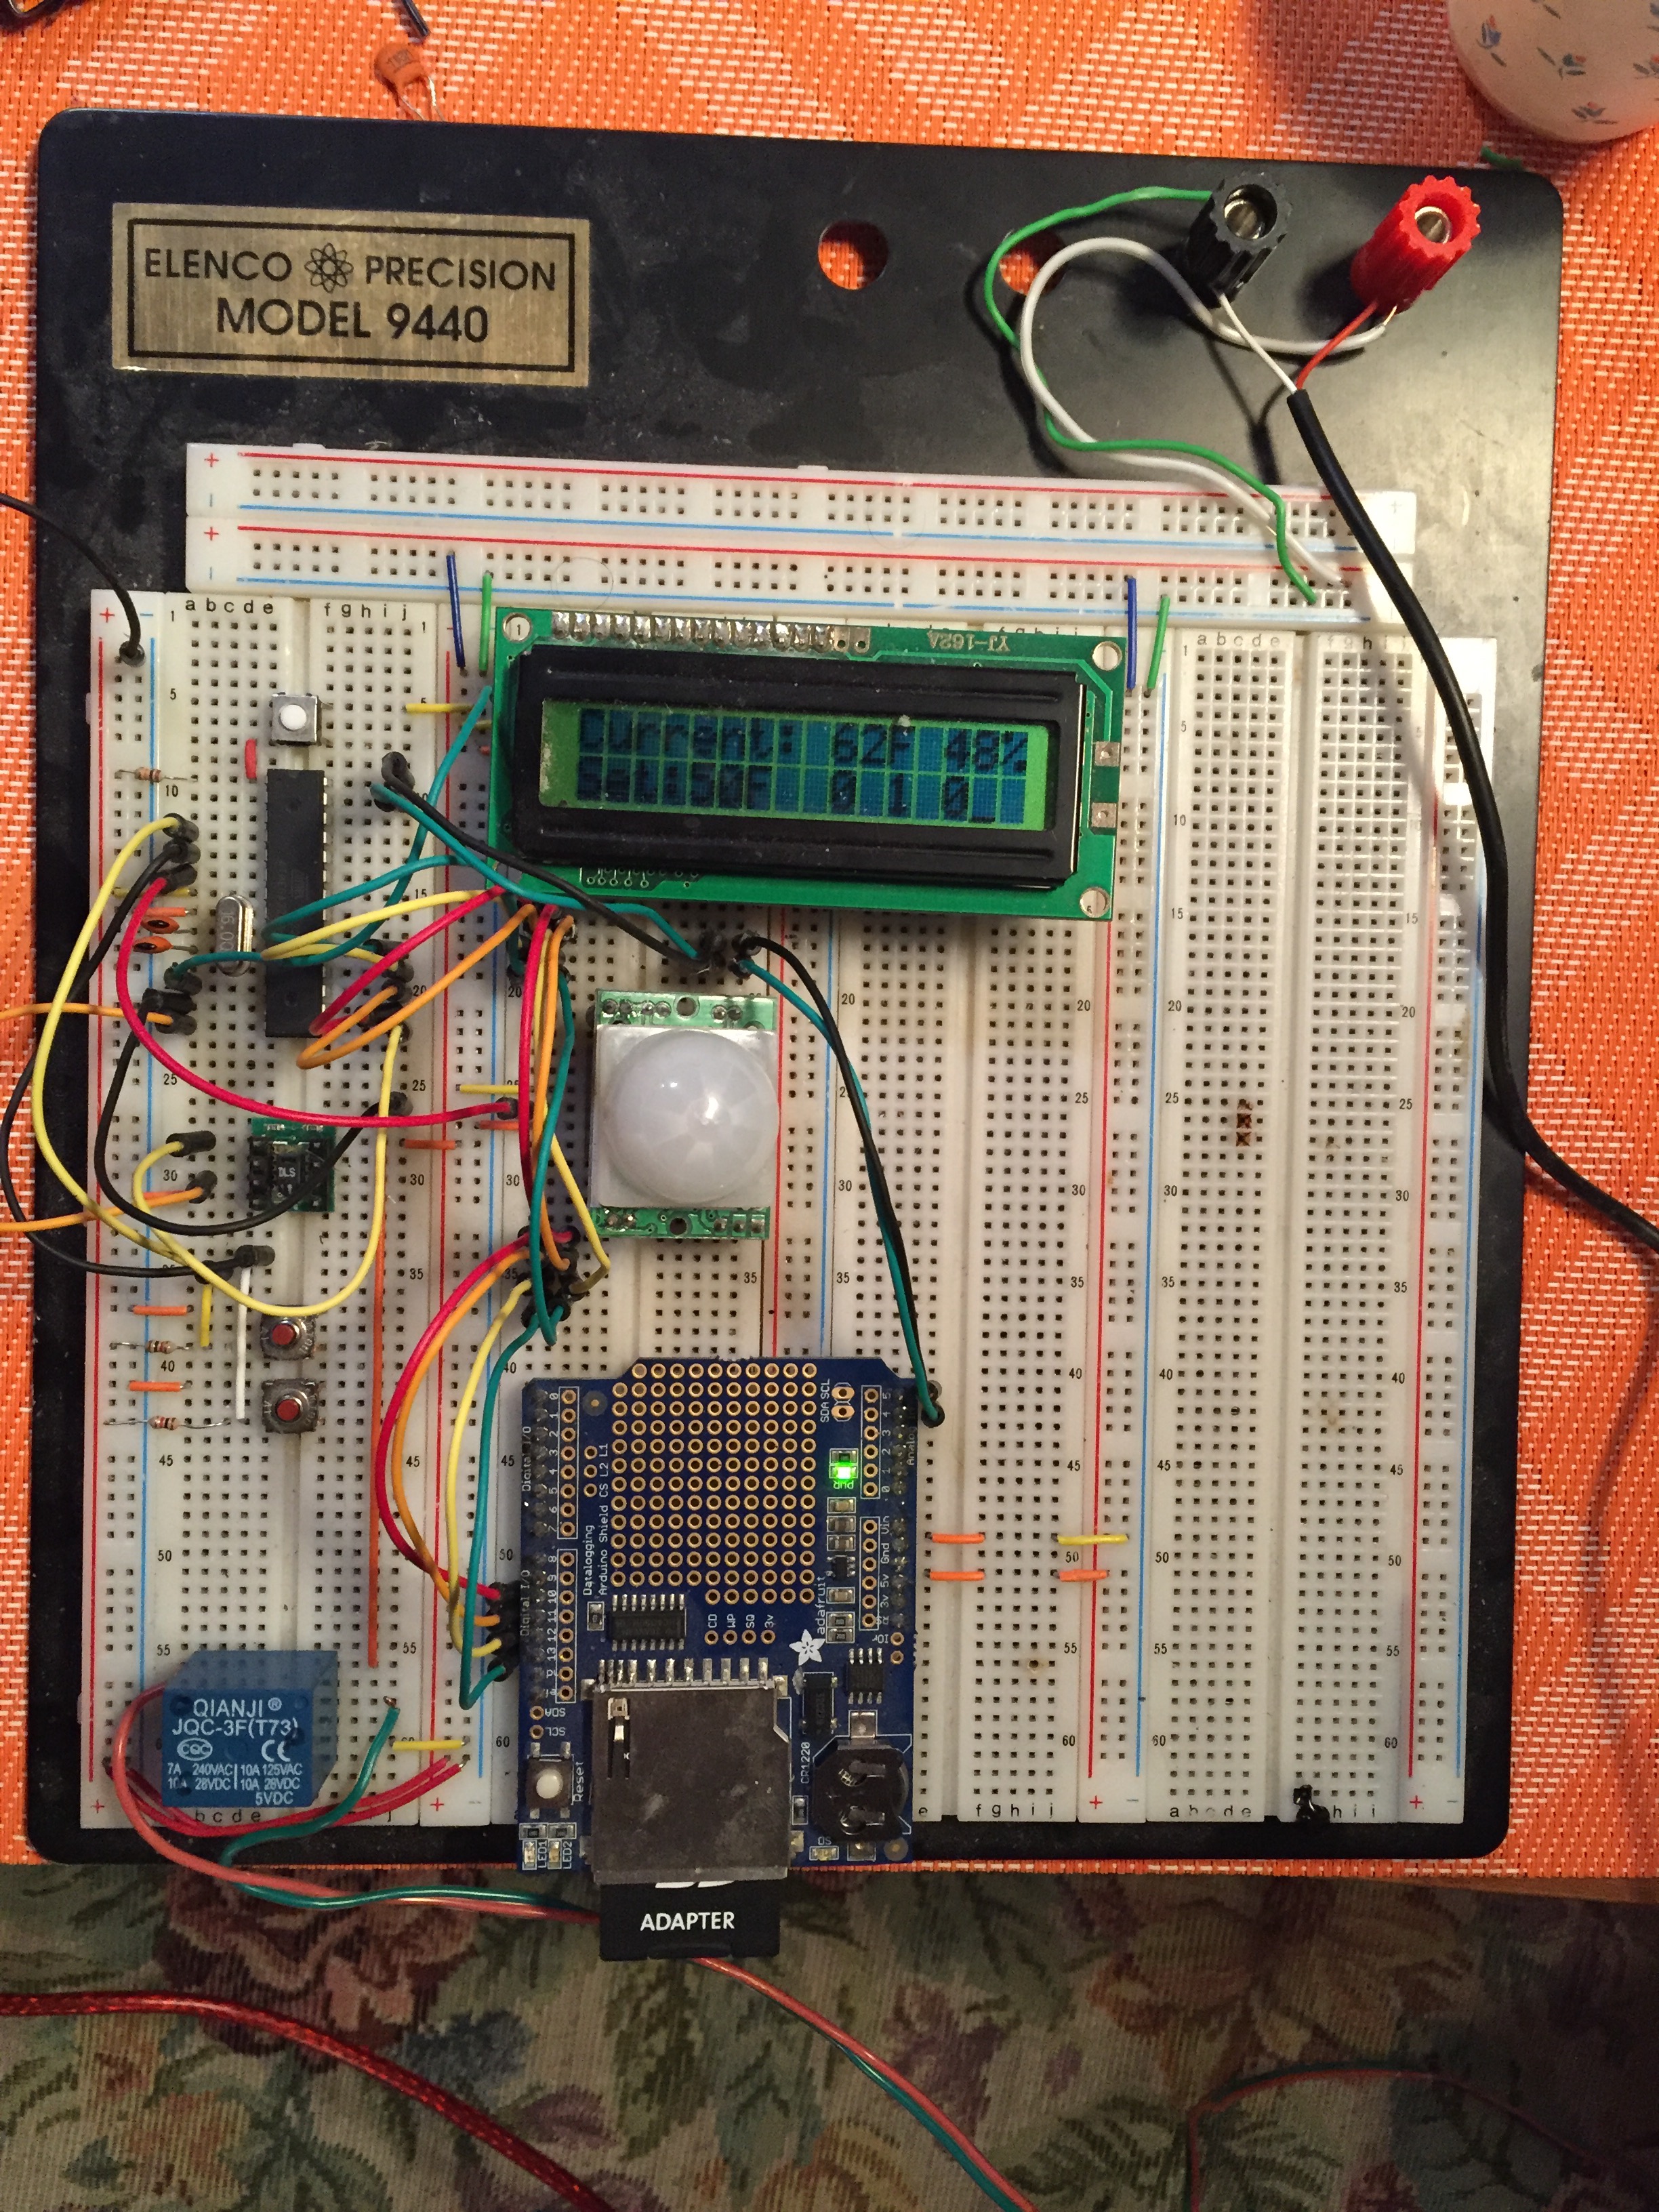
Armed with a prime directive of feeding myself, the PFC is taking a necessarily secondary position, but I’m keeping it’s spirit nearby. The systems I’m designing to control my growing environment are taking their cues from the PFC. I’m trying to keep my equipment selection to PFC compatible options. Eventually, I hope my system will run on the food computer software. In that sense, I’m skipping the PFC and going straight to the food server, though I do plan on having a dedicated PFC as well.

I already have about 80% of my hydroponic operation setup, and hope to be starting seeds by the end of the year. Naturally, I will be writing about the journey as it unfolds.

Keep making stuff (and remember, growing food counts as making stuff!)


SXSL – Mr. Dubs Goes to the White House

white_houseIf you’ll allow me to brag for a moment, I’ll tell you about my trip to the White House. During the first week of October 2016, I had the honor of spending a few days in and around the historic establishment. Now, I’m no journalist, and I prefer to keep this blogs focus on my lifestyle not my life. The details of my day to day personal life will rarely grace these pages. But, the impact of this experience has helped shape my future, and I need to share this in order to tell you what comes next. And so I present my White House adventure…

The occasion was a festival called South By South Lawn (SXSL). Most people have likely heard of the South By Southwest (SXSW) festival, which is a longstanding hotbed of great music and films. But, it also features panel discussions on some of the most important topics for the culture of today, and of tomorrow. After President Obama’s visit to SXSW in 2016, the White House team decided to capture that spirit on the South Lawn.

I’ll refrain from “reporting” on the event, you can read about it straight from the White House website. There is also a great photo spread on the White House Medium channel. (shameless plug: I’m in the last picture, preparing close out the day by watching the premier of Before the Flood).

signThe day began with a bang, as I got to help the one and only Adam Savage (MythBusters, Tested.com) set up a SXSL sign he had helped create with a team of Makers from Baltimore. You can watch his build video here! And, here is a time lapse video the White House crew made of us setting it up.

adam_selfieIn my previous life, I had the pleasure of meeting an incredible number of famous folks, but none more gracious than Adam. Our conversation covered topics from difficulties in making 100% whole wheat bread to similarities between tempering steel and conching chocolate.

The event was graced with a number of exhibitors, many of whom were involved in food based initiatives. These were of particular interest to me, as I had just harvested my first successful garden (more on that later), and was keen on growing as close to 100% of my own food as possible.

Among the attendees was Green Bronx Machine and Kitchen Garden Laboratory. In a world where a staggering number of children don’t know where food comes from, these two initiatives are teaching students about food and nutrition, even in an urban agriculture setting. Together, they were preparing incredible food picked straight from tower gardens.

The Global Alliance for Clean Cookstoves had an incredible selection of stoves on display. Solar stoves, solar ovens, alternative fuel options, and stoves that can charge electronic devices while they cook. In less fortunate parts of the world, many are forced to cook with wood indoors, causing millions of deaths from smoke inhalation. These stoves offer safe and efficient options for the 3rd and 1st world alike.

pfc_1But perhaps the most inspiring part of the day was my visit to the tent of the Food + Future CoLab, a joint venture between IDEO, Target, and the MIT Media Lab. I met Caleb Harper, who introduced me to his Food Computer. Caleb runs MIT’s Open Agriculture Initiative out of the Media Lab.

You can expect dedicated writing about the food computer, but here is the gist. It is essentially controlled climate growing. This is not new in and of itself. Greenhouses and hydroponic growers have long since employed such techniques. You can even buy commercial machines much like Caleb’s food computer right now, but you will spend thousands to grow very little food, and be subject to proprietary technology in a “black box”.

pfc_2

In traditional MIT spirit, the food computer is open source, so there is a much bigger community picture at play here. The computer uses a “climate recipe” to control all of the variables. If you devise a successful climate recipe, you can share it with the community. Likewise, you can search the database to see what recipes are available, and download one that suits your needs. Plant a seed, press play, wait for food. All of this community effort will enhance the hardware design, software design, and climate recipe database. The result is a system that gets easier and cheaper to build and operate, and most importantly can be scaled up. There are already Food Servers (shipping container sized food computers) and plans for warehouse sized Food Data Centers. These systems can be deployed in cities to provide a local food source, or in areas/climates where food is scarce. I’ll be writing more details about this as I engage in this initiative myself.
pressSo my trip yielded some much needed inspiration and direction, and my tour of the underbelly of the White House machine was unprecedented. I’m not sure if the experience is a testament to how cool I am, or how cool my friends are, but I’m quite certain it’s the latter.

The Water Whisperer

shurflo_box
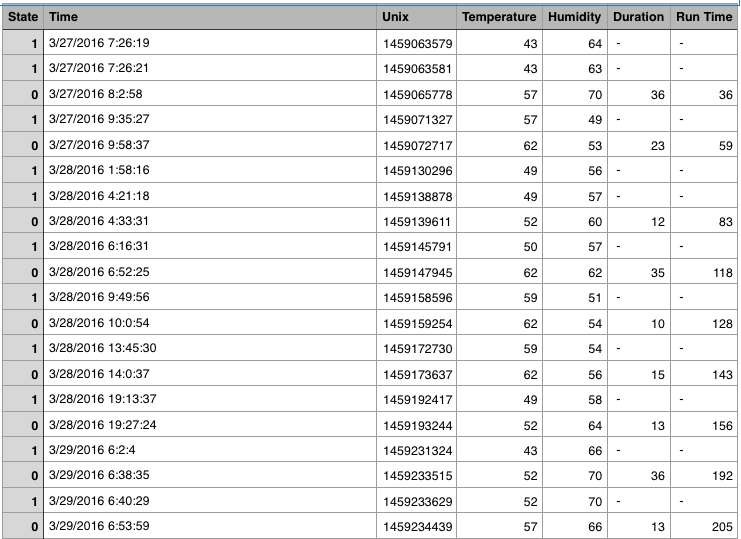
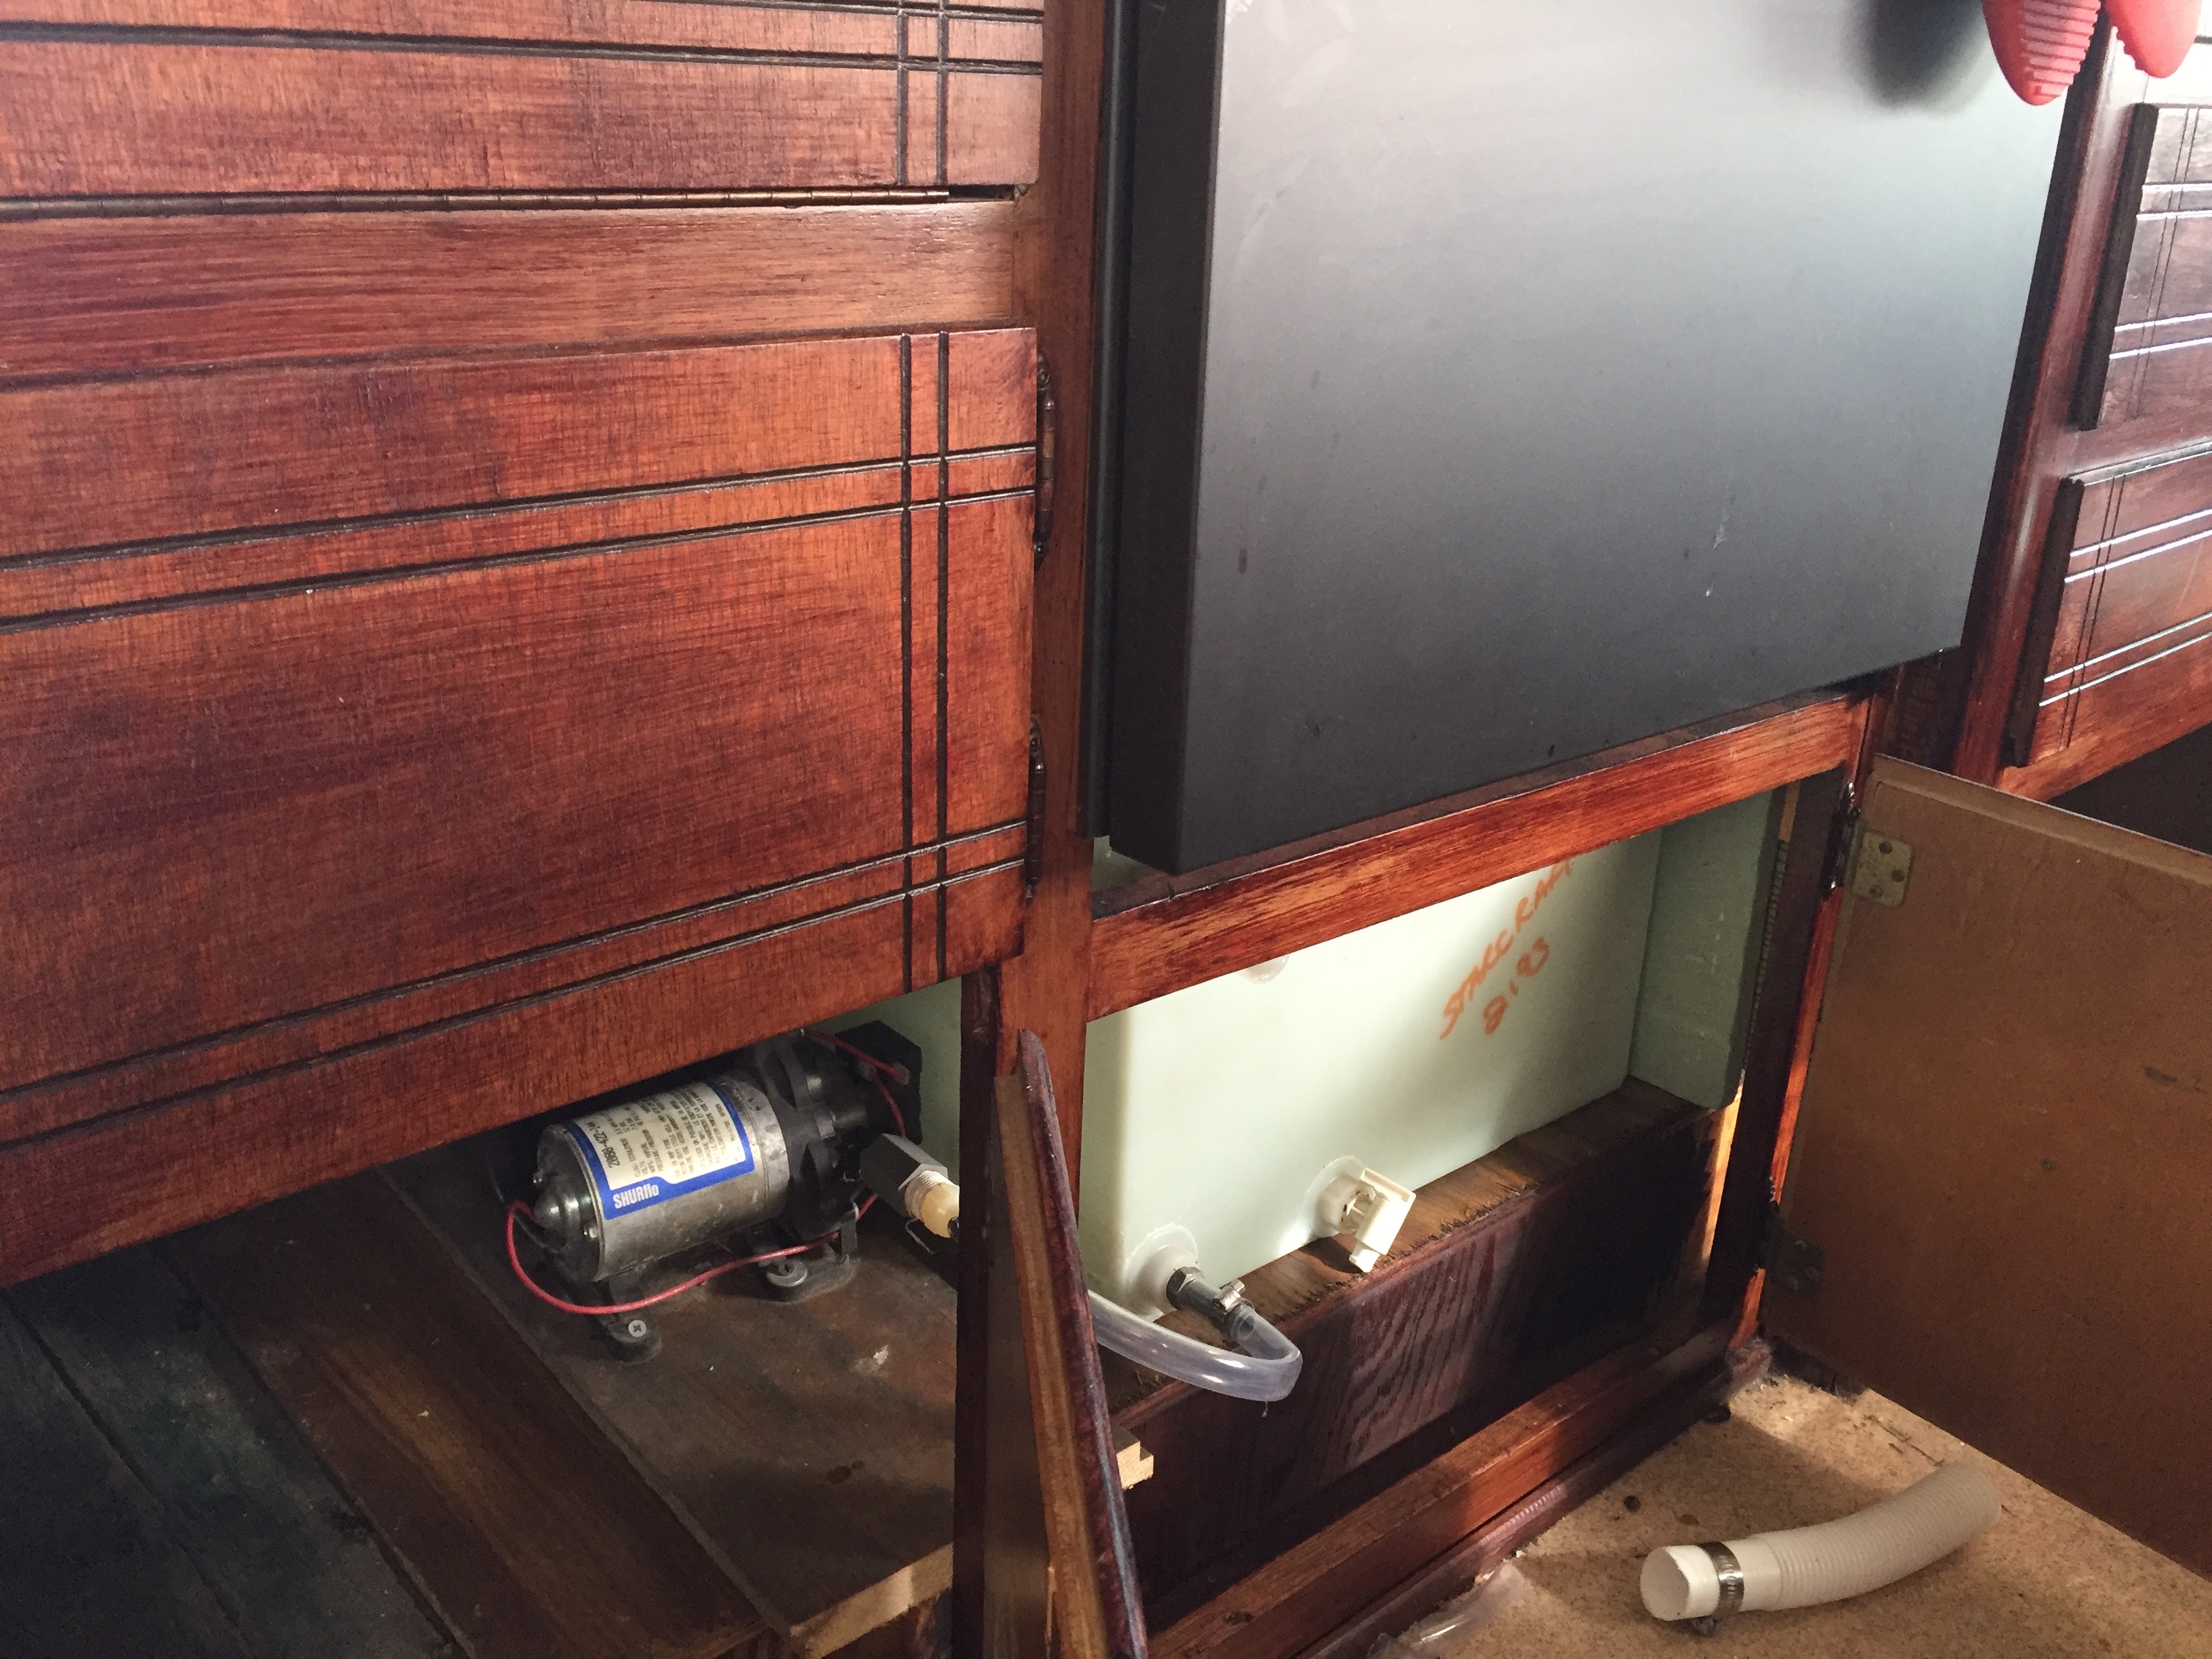
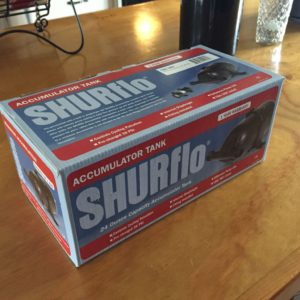
If you use a 12 Volt RV style pump for your water, you need to install one of these RIGHT NOW!

It’s called an Accumulator tank, and it is much like the bladder tank you’ll find in a typical residential water system that is fed from a well. It’s purpose it to maintain pressure in the system, and it provides a number of wonderful benefits.

I have described my water system before, in case you want to get up to speed. I use a demand water system. The pump has a pressure switch that turns on when the water pressure drops. So basically, when I turn on the faucet, the pressure drops causing the pump to turn on and supply water. When I turn the faucet off, the pressure quickly builds back up, and the pump turns off. Thats simple on paper, but in practice it has some drawbacks. Chiefly, you cannot turn the water on a little. The faucet has to be wide open, if at all. Otherwise, the pump suffers from pulsation. It’s reminiscent of “water hammer”, but its different. When the water flow is restricted by a semi-open faucet, the pump turns on and off rapidly as the pressure rises and falls over and over again. It’s annoying, and its bad for the pump. It also makes using a sprayer difficult. My sprayer caused pulsation until I modified the mesh outlet. With this tank, that would not have been necessary. Having to run the water wide open means a lot of water gets wasted while rinsing dishes or washing hands. Not to mention the mess of water around the sink that results from the impetuous flow.

Enter the accumulator. It is a accumulator
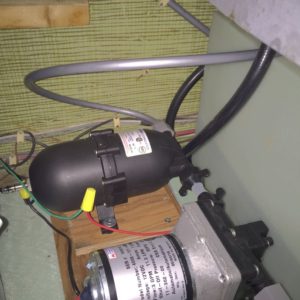
pressure vessel that contains a bladder that is filled with air to 30 PSI. When water is pumped in, it compresses that bladder, increasing the pressure to a point that tells the pump to turn off. When I open the faucet, the initial water pressure comes from the ACCUMULATOR, not the pump. This means that I can turn the faucet on as little or as much as I need to. As the water leaves the accumulator, the pressure eventually drops until the pump turns on to maintain the flow of water. When the faucet is turned off, the pump will continue to run, filling the accumulator until the bladder provides enough pressure to turn the pump off. It’s a lot like a capacitor, but it stores hydraulic energy as opposed to electrical. And, much like a capacitor will filter or “smooth” out a signal, this smooths out the water flow.  It took a moment to get used to, as the pump does not turn on right away with the faucet, and it runs for a few seconds after you turn it off.
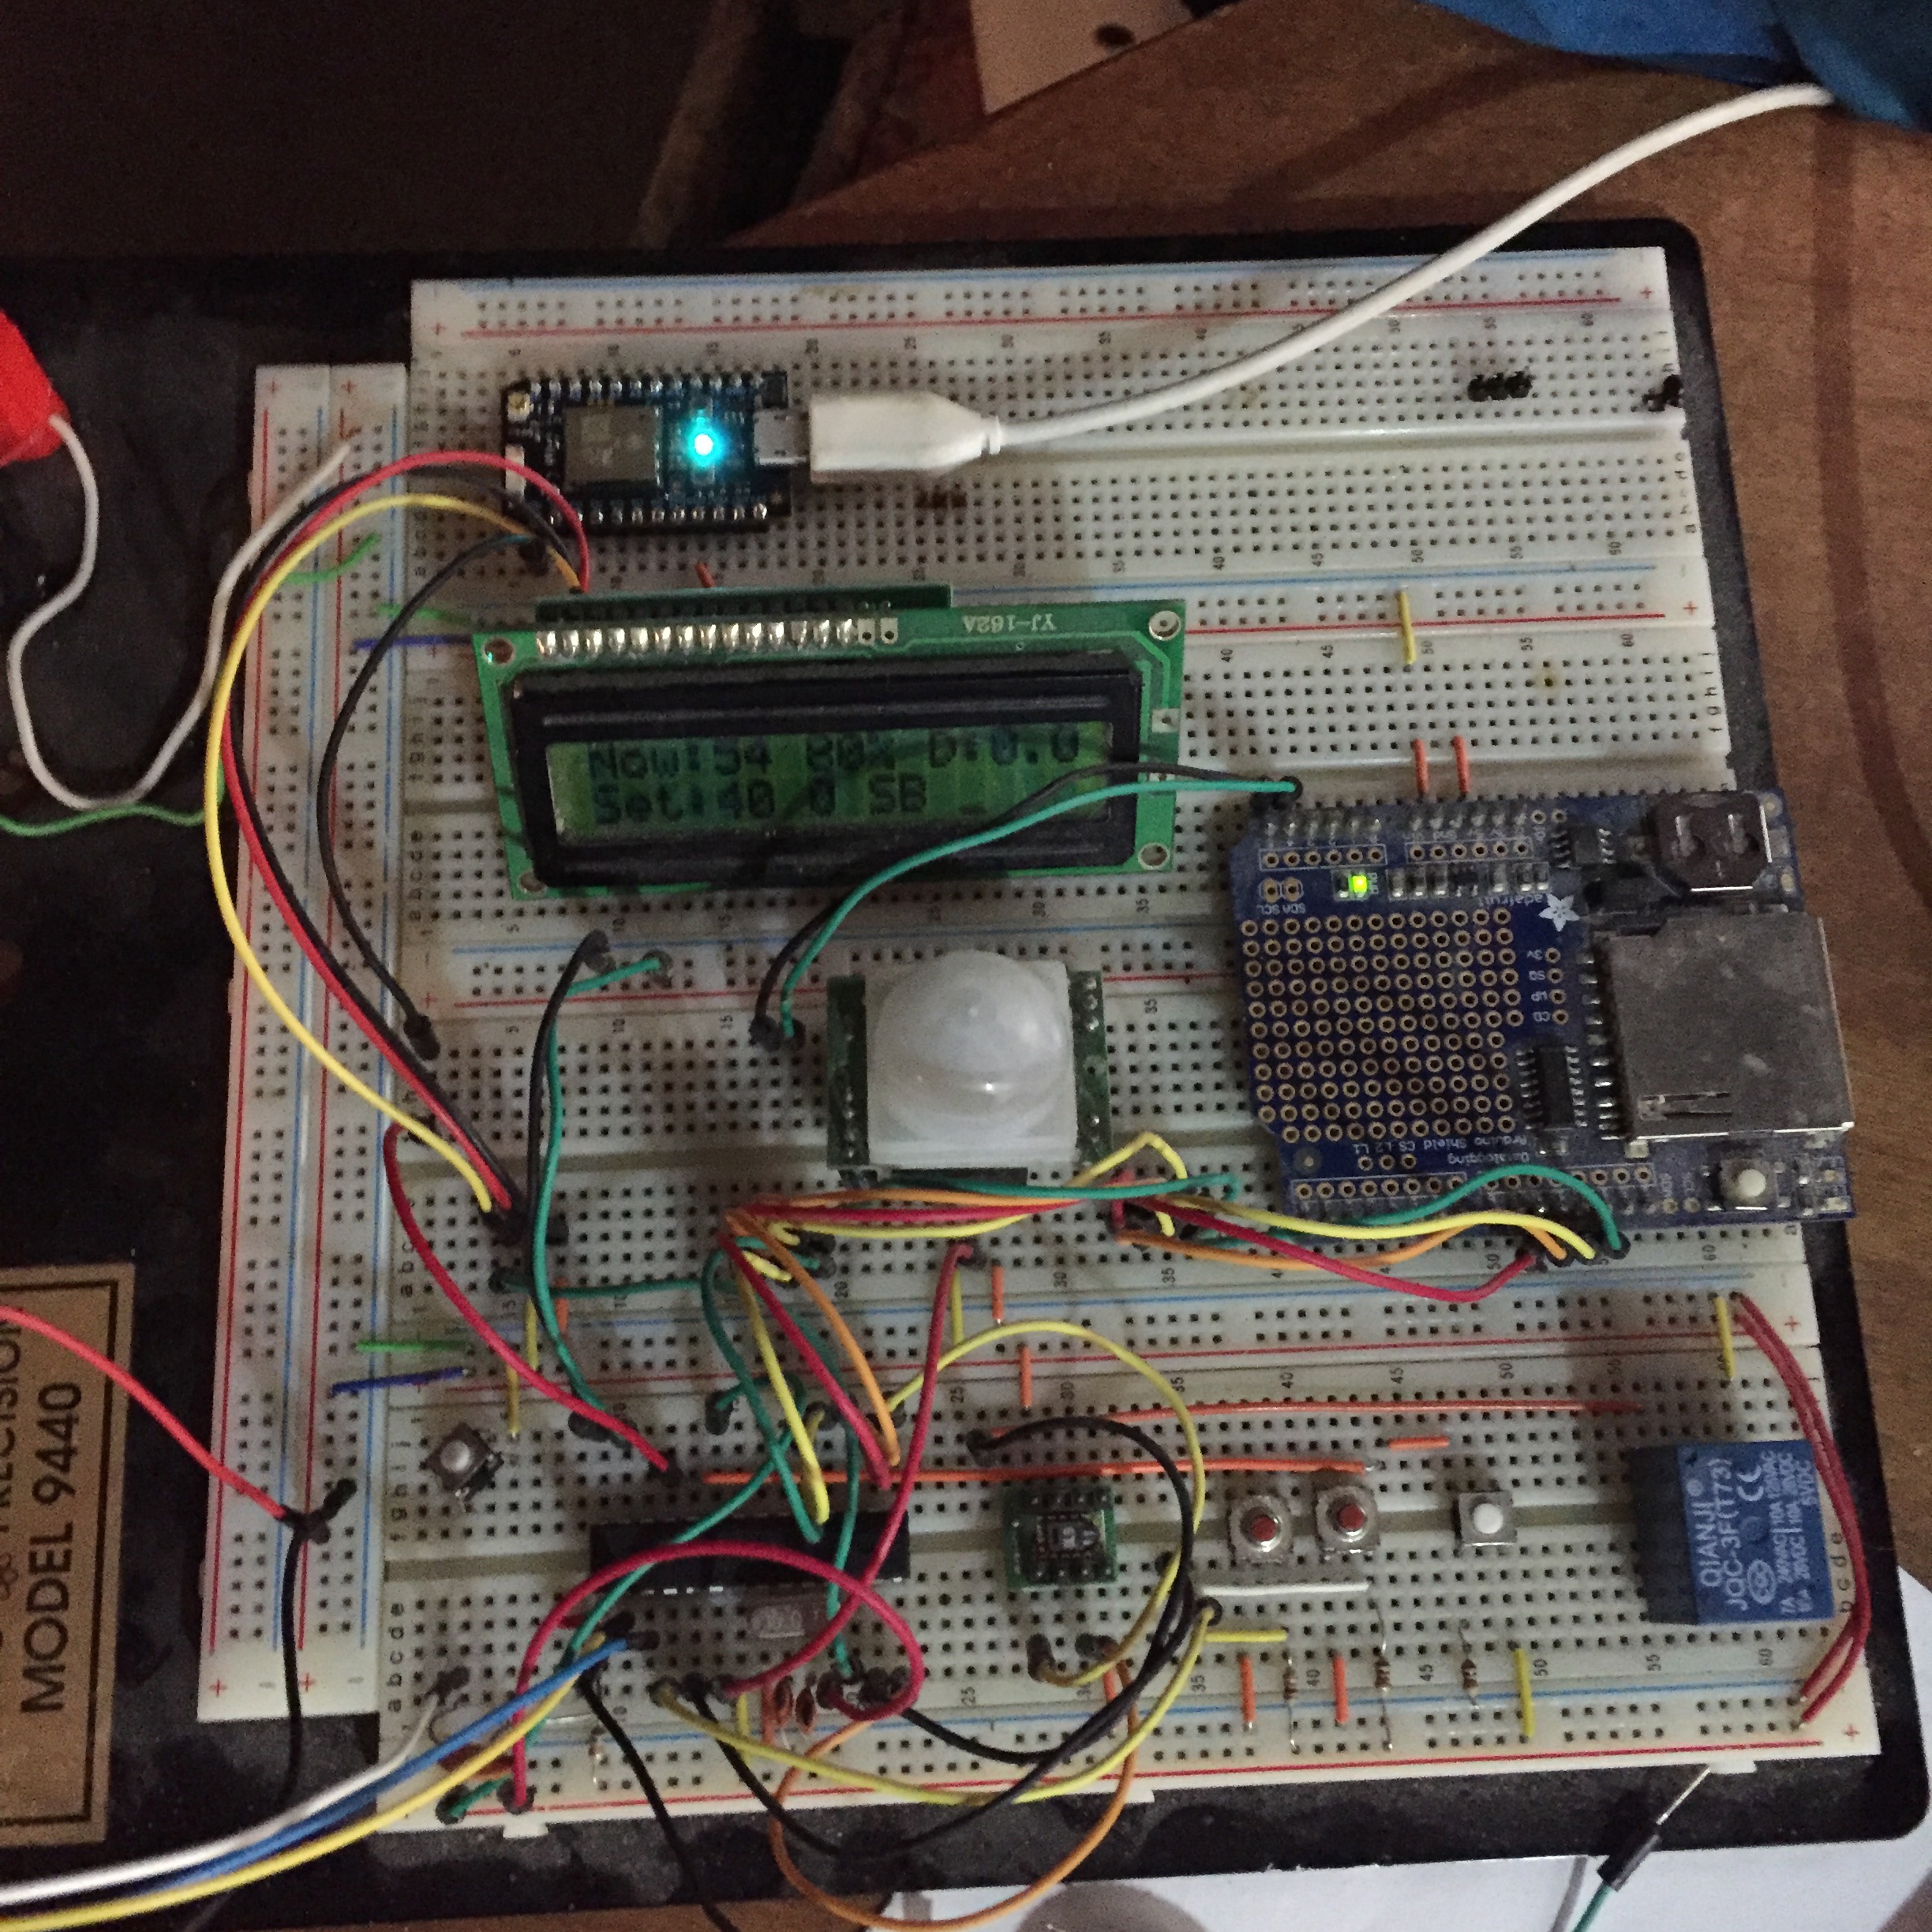
It comes pre-charged to 30 PSI. It has a standard air valve, should you need more pressure for your particular pump, or if you need to replenish pressure lost over time. It came with a coupler, so installing it right next to the pump required no additional fittings or hardware. They are commonly available for $40-50. In my humble opinion, this is a must have item. I wish I had done this sooner.


Thermostat Update V2.0

img_1355UPDATE: Version 3.2 is live. Read about it HERE.

This is just an update on some thermostat happenings of late. I recommend reading the original post to get up to speed.

DELAY CIRCUIT

I have mentioned elsewhere that I maintain a temperature of 40°F overnight while I sleep. I find that to be a great temp for sleeping, and for saving on propane. It’s a bit rough for getting ready for work in the morning, though. I tried keeping it at 50°F overnight when I started getting a steadier income, but realized just how much propane it takes to get an extra 10 degrees. I decided to add a delay function to the system. I did not want to futz with the complexities of a programmable timer circuit, especially since the RTC chip is not known to be super accurate. I decided a simple delay was best. It’s just a button that increments a delay time. I set the delay for, say, 7 hours, and go to bed. When I wake up the furnace will have been running for about 30 minutes, and its good and toasty.


REMOTE (WEB) CONTROLimg_1320

I had always planned to introduce the thermostat to the Internet of Things, and finally made that happen this weekend. I’m still debating on my final approach, but for now, Ive gone with the Photon from Particle.  It proved to be a REALLY fast and SUPER EASY platform that saved me a TON of headaches and development. No hosting a local web server, no port forwarding, no dynamic DNS. Almost plug and play! I have a lot more work to do. The interface is virtually non-existent besides a simple on/off. I want to get some feedback from the system, like temperatures and runtimes. The problem is the difference in logic level. The Atmel chip uses 5V logic, the Photon uses 3.3V. Luckily, 3V is the threshold for the Atmel pins to go HIGH, so the Photon CAN trigger the Atmel chip. But I can’t safely send any info from the Atmel to the Photon without damaging it with 5v. I’ll be getting some 74 series level shifting DIP chips soon, but until then, I going build a simple voltage divider to tide me over.


My eventual plan is to have my Raspberry Pi operating as the brain of the camper, controlling all the sub systems though a web interface. I’ve gotten as far as running Apache and PHP on my Pi, but its the old (orignal) Model B, and I think I’m due for an upgrade. I’ll write again when the web interface is complete. Keep making stuff!


The Jedi Light Trick

img_1353

I have grand schemes on setting up a solar powered LED lighting system in the camper, but until the money and motivation magically align, i’m just making it up as I go. All of the light fixtures in my camper are old and cracked and falling apart. The central most light fixture died completely recently, and I made do without it until now. Years ago (January 2012) I built an infrared light switch (programmed with Arduino and housed in an Altoids tin) to control some halogens I no longer use. I stumbled across that old circuit today and decided to repurpose it. I wrote about the original build back then, if you care to read the details. It has the schematic (EagleCAD) and Arduino code attached if you want to build your own. My dad (who is obsessed with LED lighting) had just given me a neat 12V LED array to check out. He is always finding cool lights like this on eBay.

The circuit is powered with 12v because it uses a 12V relay, which was all I had on hand the day I built it. I’d like to redo it with a 5V relayimg_1346 since that is all the Atmel chip needs to operate. 12V poses a couple of problems. First, since the chip requires 5V, I have to step the voltage down (with a 7805 in this case) which is not very efficient. Second, the Atmel chip cannot switch the relay on its own. The voltage/current is just too much. So I had to use an NPN transistor to switch to relay on. The chip switches the transistor, which in turn energizes the relay. I wasn’t really in the mood to re-solder a different relay in, and then have to re-write any code, so I left it as is for now.

img_1354It’s all programmed with Arduino. Its quite simple code wise, with about 40 lines of actual code. It really just monitors the iR detector for light reflected from the emitter (from a hand for example), and toggles the relay on and off when it sees it. The lights ground is switched via the relay. It was tricky to get the sensitivity right, as I recall. I thought I was going to build a ton of things into Altoids tins, but as yet, this is the only one.

The switch is located near the entry door. When I come home in the dark, it just takes a Jedi style hand gesture and the centrally located light will illuminate. I may be up to some solar and lighting projects in the near future, so stay tuned. Enjoy the included video, and see the link above for the circuit details from the original build post.


Keeping Warm, Part One: My Thermostat

IMG_0833

UPDATES:

See Version 3.2 HERE

See Version 2.0 HERE


Now that the northern Maine temperatures have finally crept above 40°F on a regular basis, I decided it’s time to talk about how I managed to stay warm this past winter. I’d like to start things off with my thermostat. There is a lot to say here, so i will devote the whole post to it. Other cold beating techniques will be discussed in part II.

Why Build a Thermostat?

“You know, you can buy a digital thermostat at Lowes for $17?” I got some version of that response from almost everyone I spoke to about my idea of building my own. The thermostat that came with my camper was working just fine. I didn’t need to build one, I wanted to build one. I take great pleasure in making things that solve a problem, and my DIY thermostat had the potential to solve a number of problems.

The first problem it solved was saving me $17. Everyone was right, I could just by a thermostat. At the time, Lowes had a basic digital Honeywell thermostat for $17. At the same time, I was broke, and $17 buys an epic amount of ramen. My geek stash had all of the bits and pieces I would need already, so there was no expense incurred in this project. The cost of propane was a big concern for me. I decided I needed to maintain a minimum of 40°F. Warm enough to ensure my water didn’t freeze, but cold enough to conserve on propane. My analog thermostat only went as low as 50°F, and “OFF” was so close to 50°F that I could never be sure if it was on 50°F of off completely.

Some higher tech solutions were deployed for extra geek cred. I knew I would forget to turn the temperature down before I left for work sometimes, so I used an infrared motion sensor to tell whether I was home or not. I wanted to gather data regarding how long, and how often my furnace ran. It would give me a gauge on how many hours of run time I could get out of a tank of propane. I used a data logger to write data to an SD card for later science.

How it Works

I’m going to try my best to keep it as layman as possible for the electronically uninitiated, but I will include some gritty details later to appease the electron junkies in the pack. This whole system is run by a microcontroller. Think of it like the processor (CPU) in your computer or whatever device you’re using to read this right now. All of the code that makes up the software you use is just a series of instructions that is read and executed by the CPU. So, I write some code, load it onto the controller chip, and it runs the program over and over. In this circuit, there is a temperature and humidity sensor. The controller constantly asks the sensor what the temperature is. I set my desired temperature by using two buttons to bring it up or down. When the temperature reported by the sensor is lower than the temperature I set, the code turns the furnace on. It’s more complicated than that, but that’s the basic idea. The controller also uses the infrared sensor to check for motion. If it sees no motion for an hour, it goes into a 40°F standby mode. Any time the furnace turns on, that event is logged to the SD card, including the time. When the furnace turns off, that event and time is logged as well. The times are subtracted from one another to determine how many minutes the furnace ran. That time is added to a cumulative run time.

The Geek Stuff

Here is some jargon. Feel free to skip this paragraph. This was programmed using the Arduino environment, but in a standalone arrangement (the controller runs on its own, without the support of the programmer). I’m using an older Sensiron temp/humidity sensor, and Adafruit’s Datalogging Shield. All of the pertinent info is written out to a Parallax 2×16 LCD. The furnace turns on with a contact closure, which is achieved by energizing a 5V relay. There is a mix of both i2C and SPI serial communications. The Sensiron chip uses i2C, the data logger uses BOTH protocols (i2C for the onboard RTC chip, and SPI for the SD read/write operation). I’m happy to share my code with anyone interested, but I’m not sure how compatible it is with more modern temp sensors.

thermologThe Numbers

I lucked out, because we had a very mild winter. The lowest temperature I saw was -16°F  (our wind chills brought us down to -30°F once in a while, but not often). I only spent $300 on propane all winter, and I was expecting much more. Each 20lb propane tank gave me over 30 hours of burn time depending on how much I was cooking (the stove uses the same propane). The spreadsheet on the left is a screen grab of the CSV file as it is written to the SD card. By keeping the temp at 40°F while sleeping or when I was gone, I saved a buttload of money. It took an exceptional amount of additional propane just to try to maintain 50°F overnight. Sleeping at 40°F was quite pleasant. A good sleeping bag is the only prerequisite. Getting ready for work in the morning is NOT quite so pleasant at 40°F, but I wasn’t expecting this to be easy.

Conclusion

What I really love about this process is the troubleshooting aspect of problem solving, and what I learn as I navigate it. Reality never behaves the way our ideas do on paper, and the act of wrapping our brains around those surprises teaches us a lot about the world. Sometimes, something seemingly so simple is actually far more complex. Sometimes, very complex things have very simple answers. I assumed that my code could say “when the temperature hits 60°F, turn the furnace off.” But in reality, the temperature fluctuates a lot as the room seeks equilibrium. The furnace would turn on and off several times while this happened, and it was hard on the electrical system. I had to write code that held the furnace on through a “buffer” period to let the room stabilize, and that minor change took more thought to engineer than the whole system did.

When we finally hit a warm spell, my furnace died! The timing couldn’t have been any better. It would have been an outright calamity even a week before. I had just made $80 helping my Mom out, and the part I need to fix the furnace happens to cost $80. Oh, how kind the universe can be when I don’t get in the way. In part two, we’ll talk about clothing, and the dynamic nature of human comfort.

UPDATE: I’ve added some features! See Version 2.0 HERE

Water Always Wins

From a small space colony on Mars, the 10th incarnation or Dr. Who once proclaimed that “Water always wins”. Similar words have been spoken by many, and how true they are. Usually this phrase is in reference to the forceful nature of water. Be it the quick and powerful decimation of a tsunami, or the slow and persistent relentlessness of a river carving a canyon. For the homeowner, it refers to the nagging inevitability that ALL roofs eventually need repair. Water will always find the tiniest of flaws and proceed to reek havoc. I’ve certainly had to repair a significant amount of water damage from the moment I purchased my camper, and I continue to find small leaks as time goes on (In fact, I woke up to a water leak on my head during a recent warm spell). But the phrase has taken on a new and more subtle meaning for me, in regards to two factors; moisture and temperature.

sink
The sink is barely large enough to hold one medium sized pot, let alone clean multiple dishes.

The first ‘tragedy’ involved my water system. Being that the whole system is contained under the kitchen counter, the temperatures get a little colder down there. I knew this would be the case, and I left a couple of air gaps to allow some warmer air in, but it was apparently not enough. The bottom of the cabinet is essentially the top of the wheel well. I did not realize how poorly insulated this wheel well was. As it turns out, it’s not really insulated at all. A couple of days after Christmas, I arrived home to find the water was not flowing. I used a heat gun to thaw the pipes, but it was too late. The expanding water must have caused a small leak. This caused the pump to turn on and pump out all the water remaining in the tank. Once the water was gone, the pump just ran and ran until it burned itself out. The good news is that the tank was all but empty, meaning there wasn’t really any spill to deal with. But my pump was dead, and so was my wallet, so I’m back to living out of a water bucket.

This is just one example that proves the complexities of the simple life (a whole post is coming soon on that). In reality, there is no simpler water system than a “good ol’ bucket o’ water”, but it makes using the water more complex. Doing dishes becomes a clunky and messy chore sans faucet – and a tiny sink does little to alleviate the matter.

frost
Frost caused by moisture in the air and collecting on the thermal bridge of a metal door frame.

My other surprising issue was moisture related. I went into this endeavor with an awareness for the potential of moisture issues. I’ve spent enough nights in campers and tents to know just how much moisture results from human breath alone, even from one person. I hadn’t really noticed any moisture issue in this camper. The thermostat I built includes a humidity sensor, and it reports quite low levels of moisture. The only time I see moisture on the walls is if I cook with lots of water, which is rare. The one issue that is consistent is frost around my door. The frame is metal, and acts as a thermal bridge to the outside. When moisture condenses on it, it freezes, but this is not really a problem. It merely shows that there is, in fact, moisture in the air.

insul
Adding a layer of fiberglass to the bed over the cab helps keep the cold seams from collecting moisture in the form of frost.

One day, I had to shift my bedding around. My bed is made up in layers with a Reflectix insulation layer, a camping pad, a foam pad, and a ‘tempurpedic’ pad. While rearranging the layers, I noticed that it was wet underneath. It turns out that the moisture from my overnight breathing was collecting up there (the bed area is elevated over the cab of the vehicle) and it would condense in the corners where it was colder. This would collect as frost when it was cold, and eventually melt, creating small puddles of collected water. A few spots had even begun to develop black mold, which can be a huge health risk. I pulled it all apart to dry up, and slept on the “couch” for a while. I bleached away the black mold, added a layer of fiberglass insulation, and sealed everything with weather tape. I’m back sleeping up there. It is much improved, but cold nights can still result in mild frost, so I have to monitor it often. Luckily, it’s been a mild winter here in northern Maine. My coldest measurement so far has been 16 degrees below 0 (about -30 with wind chill) and that was brief. Usually, we see spells of 20 below for a week or more at at time.

I’ve learned that this vehicle seems to do quite well down to around 20 degrees. Beyond that, things become more of a struggle. I have to say that of all the challenges I expected, frost wasn’t really on my radar. All in all, the cold is manageable, but this structure is far from practical or efficient to be feasible in this extreme of an environment. Next winter will have to involve a new plan, because Jack Frost is an asshole.


Squirrel – It’s What’s for Dinner

IMG_0763My audience is going to get divided here. Some of you are outdoorsy, meat eating country folk. Some of you are vegan. Some of you fall somewhere in between. For my non-meat eating constituents, please read on (if you haven’t stopped already), there’s a bigger story here about an accidental experiment, and the lessons it taught me.

For the record, I am not a fan of killing animals (I ate a vegan diet for an extended period, but got away from it for a plethora of reasons that are beyond this post). I have absolutely no issue with folks who hunt (legally), it’s just not for me. I do currently eat meat, however, and I find that a tad hypocritical. It bothers me to think that I don’t want to kill an animal myself, but I have no issue eating one if all of the dirty work has been done for me. The fact is that we are removed from our food sources in modern society. We usually don’t buy packaged hamburger and think, “this used to be a cow”. Many don’t have the stomach to even think of the slaughter/butcher process, let alone perform it. But we have the stomach to eat it, because we can at least pretend to be blissfully unaware of where it really came from.

When I got my camper parked in its winter home, I was graced with a booming red squirrel population. They ran all around, bouncing on my roof, squeaking incessantly at each other. I was pretty sure they were going to pose a problem. I wondered if they would calm down after mating season and leave me alone. Then I heard the chewing. I was aware of the IMG_0764damage squirrels could do. Over the years, they had destroyed a number of items I had stored in a small barn. But this camper is my home. They could easily get inside and nest, or destroy my electrical system, and otherwise drive me right out.

I tried a product called Repels-All. It seemed to have no effect. It smelled awful – it repelled ME more then the rodents. I knew I could possibly live trap them and relocate them. I’m not sure if my city ordinance would allow it, but I couldn’t afford those traps anyway. Plus, I worried about taking them away from their nest, and all of the food they had gathered all season. Would they just die a slow starvation death? Research told me that rat style snap traps were no use because squirrels were too smart, but they were they best resource available to me. I got the beefy plastic trap made by Tom Cat, and set it on my roof with peanut butter bait.

I began to work on a storm window, and a mere 5 minutes after the trap was set, I heard a “snap”. It took me a second to realize what the sound was. He flopped around a few times, and I started feeling bad that these traps weren’t strong enough to kill, and I’d have to put him out of his misery. But he died almost immediately. I was feeling pretty bad about it, even though I felt justified. But now what? What am I supposed to do with a dead squirrel? I decided I’dIMG_0770 feel better if I honored the animal by not wasting it. I have never ‘processed’ and animal before, so I asked the internet. I skinned and gutted it, then boiled the meat for a while before breading and frying it. I was amazed at how good it was. What does it taste like? It simply tasted like the spices I breaded it with. Red squirrels are small, and even though this one was big for his species, there wasn’t really enough meat for the effort it took.

The next day, I opened my cabinet to get my laundry, and I was floored. It turns out, a squirrel HAD gotten in. I had recently worked a 24 hour shift, and in that time he was busy. There was a large mound of torn up paper, about 2 cuIMG_0771ps worth of seeds in my laundry bag and a few articles of clothing had been chewed to destruction. I suddenly wasn’t feeling so bad. My inner scientist took over and reminded me that I am a Darwinist. I get that the squirrels are just trying to survive, but so am I. In total, I caught 4 squirrels. I did not eat the other 3, because I have a fox nearby. I left the carcasses out which proved to be a good deterrent for future squirrels and after a day or two, Fantastic Mr. Fox comes around for a snack.

I am planning on returning to a meat free diet very soon, but for those who choose to eat meat – I highly recommend that you take part in the killing and processing of your food at least once. There is no better way to confront the fact that a living thing has given it’s life to feed you, and to see just how much work goes into turning an animal into a meal. It really puts it all in perspective.


The Saga of My Water System

stock water

UPDATE: I have added an accumulator tank to my system. Read about it here.

For a full year prior to moving into the camper, I lived without running water. I lived on a third floor, and carried the water up 6 gallons at time. For much of that time, water was available on the second floor, so I only had one flight to climb. In a nutshell, I was used to not having water on tap. For that reason, I was not in a big hurry to jump on the water system. Despite being pretty handy, I avoid plumbing like the plague. It has never agreed with me. I stuck with my big blue jug/dispenser for a while, but it was clunky to operate and doing dishes was always a mess. As the camper became more “home like”, the desire for a more managed water system took hold. My water system has seen a couple of incarnations, which I will walk through here after a brief discussion of the existing system at the time of purchase.

My RV water system, like most others, has a couple of options available. There is a fresh water holding tank (mine is about 50 gallons) and a 12 Volt pump that feeds that water to the systems pipes. The pump works on a pressure switch. It will run until it feels enough pressure to turn off. When you open a faucet, the pressure drops causing the pump to switch on. When you turn the faucet off, pressure quickly rises, and the pump stops. It’s called a ‘demand’ water system. There is also a system that uses an air compressor to pressurize a sealed water tank to force water into the system. I have no experience there.

city feedThe “City Water” connection is just a standard hose fitting. This is where you can connect to the water supply at an RV park, or to the hose spigot of that kind friend/host whose letting you mooch off their water. The wonderful bit is that the pressure is externally supplied by that system, so you don’t need your pump. A couple of points to note; 1. A regulator is recommended as RV systems are generally designed for lower pressures than those typically found from a “city water” supply, and 2. Use a “drinking water hose” for the connection, as common garden hoses get frequent complaints of adding an unpleasant taste to the water (we won’t even bother discussing the plethora of chemicals responsible for said taste).

After fixing a section of split pipe, I was able to run my water system from my fresh water tank. The pump had a faulty pressure switch, so I had to turn it on and off manually until I could replace it. I also ended up replacing the faucet due to a leak. It was leaking from an odd spot, and rather then mess with replacing bits an pieces that would cost close to or more than a whole faucet, I decided to skip all of that misery and do it all. I learned two lessons. First, and very simple, I learned that RV faucets are standard size faucets. Thats pretty obvious to anyone familiar with faucets. I am not one of those people. I get stuck assuming that everything is smaller, but it’s not always the case. The second lesson was that my pump doesn’t like aerators or sprayers. I got a faucet with a sprayer on the side thinking that it would alleviate some of troubles of having such a tiny sink (filling a pot, rinsing a dish, etc…). The pump has a hard time with it. It gives too much back pressure, so the pump kicks on/off repeatedly when I use it. It works for a few quick things here and there. I also had to remove the aerator from the main faucet for the same reason – it created too much back pressure. I was able to remove just the aerator and screw the rest of the assembly back into place so the water still has a smooth stream. Without it, the water is expelled in a messy fashion.

on standMy primary concern with water was freezing. My freshwater tank is exposed to the brutal elements of Northern Maine. Freezing temperatures are possible about six months out of the year, and for three of those they are almost constant. I don’t have a water spigot nearby, and even if I did, it would have to be protected by electric heat tape. I’m trying keeping my power consumption low, so the amperage to run heat tape would not be an option.

My solution was to set up an internal water tank. The easiest way to do so would be to put a tank close to the existing pump so I could just move one water line and keep my whole system intact (except for detaching one external line). I put the tank near the front of the camper next to the pump. It blocked the entrance to the cab of the vehicle, but I was planning on walling that off for insulation, so it made sense. I had a small 11.5 gallon tank that was salvaged from another old camper that fit perfectly. I built a small stand to set it on because I was afraid of accidentally putting my foot through it. It also gave me the ability to drain it if needed, and I planned on topping it with a cutting board to make it a food prep surface. This was all well and good, but after a few cold days I had second thoughts. Temperature readings along the walls where the water lines run were quite low. I was keeping the thermostat at 40F degrees whenever I was sleeping or when I left. 40 seemed like a safe temp to keep water lines from freezing (and my wallet from draining on propane) but my readings suggested otherwise.

Since my bathroom faucet/shower was not going to be in use (since I have no hot water heater), I decided that there was no need in keeping my WHOLE system intact. I only needed water in the kitchen. When I replaced the stove, I was a little bummed that the new one was a tad shorter, which left a gap underneath. You couldn’t really see it, and it turns out to be perfect. That extra space allowed me to fit my water tank underneath it, and the gap helps let warm air into the cabinet. Funny how things work out. There was enough room to mount the pump there, and some simple rewiring to power it. It’s actually easier to refill there as well. I carry in 3 gallons at at time, procured at my parents house with a bucket that has a spout attached. I run a line from the bucket into the tank and open the spout to transfer the water to the tank. I’ll post a video of that process soon.under stove

I should also mention the drain situation. The greywater and blackwater tanks (that hold the waste water from the sink and toilet respectively) have been removed. I have heard of people leaving them on and using anti-freeze, or leaving the greywater valve open to drain onto the ground. My blackwater tank was cracked (presumably from the previous owners letting it freeze), and the greywater tank got cracked during removal (which was actual good as I found out it had been contaminated by the blackwater). I drain my sink into a 5 gallon bucket underneath. Every so often I dump it outside. By sticking with biodegradable soaps, I can safely dump this around trees and such. Greywater reuse is a common element of many good composting programs. Since I’m a geek, I’m thinking of making a float circuit that will warn me when the bucket needs to be dumped, rather than wait for the inevitable day when I find out the hard way. I learn almost everything the hard way.

I always keep water in the kettle, so come on over. Tea time is all the time.


CAMPER or TINY HOUSE, a Ballet of Semantics

Do I live in a tiny home? This is a question I’ve asked myself often. In technical terms, I live in a Class C motorhome. In conversation I say, “I live in a camper,” but I feel very much a part of the “tiny house culture”. It is my ‘home’, and it is ‘tiny’, but it is also a ‘camper’. It all depends on the perspective. Are you describing the structure, or the mindset?

There are many different terms to describe the various pint sized domiciles available to those seeking an alternative space to call home. Some of these terms are technical or categorical, serving to differentiate between various styles. Some of them are simply subjective, and will differ from one person to another based on their perception. There are philosophical notions at play. When I speak the terms ‘tiny house’ and ‘camper’, they each evoke a separate image in my mind. Yet at the same time, both terms can evoke a common idea.

There are ‘motorhomes’ also called recreational vehicles or ‘RVs’. The characteristic here is that it is self propelled via it’s own motor – you can drive it. These are further broken down into classes. Class A is the behemoth, bus sized affair, that is usually nicer than many peoples homes. Class B is the smallest, and its basically a glorified van with some RV amenities installed. Many people will buy a common van and do a conversion, adding these amenities as they see fit. Folks living in these are typically known as “van dwellers”. Finally, a Class C is in between. Think of an ambulance. The front is a van, but the back is a larger box structure containing the living quarters, and the rear axel is a ‘dually’ (2 tires on each side). Then we have the ‘travel trailer’ which is the type that is towed behind a vehicle either via a hitch or a fifth wheel. All of the above are ’campers’, in my opinion. You’re free to disagree with me, but any rigid structure on wheels designed for the act of camping is, in my mind, a camper. Of course, most who own a camper would not call themselves tiny home owners. They just go camping in it. But once one decides to live in said camper, the very thought changes the nature of the space. It’s all how you look at it, kind of like the observer effect in quantum physics.

When I think of a ‘tiny house’, I can’t help but think of the standard residential style construction commonly called a ’stick built’ home. Stick built homes typically feature 2×4 frames, drywall interiors, a metal or shingle roof, and some type of exterior siding. My problem is that I get stuck on the word ‘house’, regardless of its size, and assume this type of construction. Many tiny homes DO fit this formula, like the fantastic and popular ones available from Tumbleweed, but many of them do not. As an interesting side note, Tumbleweed has taken to calling their trailer based structures “Tiny House RVs”, which I think may be a recent change.

The truth is, in my opinion, that the phrase ’tiny house’ is and should be divorced from any particular type of construction. It is really more of a state of mind that denounces the idea of an unnecessarily large home or an unnecessarily complex life. It applies to any compact living space, whether is a stick-built structure, a camper, a yurt, a boat, or just about anything else you can think of.

You can even live a ‘tiny house’ life in a giant house! If your looking to live in a tiny house some day, you can begin by ‘living smaller’ now. I will detail the process I used (and continue to use) in a separate post, but here are a couple of tips to get you started:

1. If your home has many rooms, try closing them off one at a time. Close the door, and consider it off limits, or use it only for storage of rarely used items. Get comfortable with having less and less space.

2. Pare down your belongings. It can be REALLY hard to say goodbye to ‘stuff’. If you come across things you never or rarely use, but think you can’t part with, try boxing them up and putting them in storage. Maybe just in a closet, or in a storage unit or one of the rooms you closed off. Put a dated sticky note on the item or box. If you truly need it, you’ll be taking it out soon enough. Revisit the box in several months to a year. You’ll likely feel better about getting rid the boxes contents when the dates prove how little you actually use those things.

3. Look at the items you use and think of how many different purposes they serve. Do they perform only one task, or several? Is there an item available that can perform several duties? Try replacing 2 items with one that performs both tasks.

I am frequently surprised by items it thought I didn’t need, but find out I do – and also by items I thought couldn’t live without that are now a thing of my past.